
Summon the 3D Power
Starting Point — Transforming the Illustration into a 3D Miniature Render
Before uploading the character to 3D AI Studio, we recommend transforming the original illustration into a clean 3D miniature render.

This intermediate step is extremely useful because the reconstruction model will receive an image that already looks like a physical object rather than a flat illustration.
You can do this directly inside ChatGPT.
Open ChatGPT, upload the illustration and enter the following prompt:
Prompt — Illustration to Printable Miniature Render
Transform the provided character into a high-end 3D collectible miniature render, optimised for 3D reconstruction and printing.
⚠️ CORE GOAL:
Create a clean, fully visible, centred miniature figure with a balanced design suitable for tabletop gameplay and real 3D printing.
🧍 CHARACTER:
Preserve 100% of:
- pose
- anatomy
- proportions
- outfit
- silhouette
- facial structure
Convert the character into a physically plausible miniature:
- slightly simplified micro-details with no visual noise
- readable shapes
- clean geometry
- no excessively thin or fragile elements
- avoid potential breaking points
⚖️ PRINTING BALANCE — CRITICAL:
- Do not make the character too thin.
- Avoid fragile weapons, individual hair strands, isolated fingers or extremely narrow pieces.
- Do not make the miniature excessively bulky.
- Avoid oversized limbs, weapons or armour.
- Maintain the perfect balance between visual realism and physical durability.
- Every part must feel printable in resin at approximately 30–40 mm scale.
🪨 BASE — VERY IMPORTANT:
- Add a standard tabletop gaming base.
- Use a circular base proportional to the miniature, with the appearance of a 25–32 mm base.
- Do not make the base oversized.
- Use a simple rock, earth or minimal-terrain design.
- Keep the edges clean and suitable for use on a gaming grid.
- Avoid excessive decoration that unnecessarily increases the footprint.
🎯 COMPOSITION:
- Show the complete body.
- Keep the miniature perfectly centred.
- Use a very subtle heroic camera angle.
- Do not crop any part of the character.
- Do not allow overlapping elements to hide important geometry.
🎨 STYLE:
- Clean professional 3D render, not an illustration.
- Matte, realistic, resin-like materials.
- Subtle colour painting similar to a professionally pre-painted miniature.
- No exaggerated gloss.
- No cheap plastic appearance.
💡 LIGHTING:
- Neutral professional studio lighting.
- Soft shadows.
- Even illumination across the entire miniature.
- Every part of the geometry must remain clearly visible.
🧱 BACKGROUND:
- Solid neutral grey background.
- No environment.
- No decorative elements.
- No distractions.
📸 CAMERA:
- 85 mm lens equivalent.
- Straight-on view or a very slight three-quarter angle.
- Sharp focus across the entire miniature.
🚫 NEGATIVE:
- no text
- no logos
- no watermark
- no blur
- no extreme depth of field
- no cinematic effects
- no environment
- no oversized base
- no exaggerated anatomy
- no cropped elements
- no missing weapons or accessories
🧠 FINAL RESULT:
A clean, high-resolution studio render of a professional 3D miniature, perfectly prepared for AI-based 3D reconstruction and STL generation.
Ultra-high resolution, maximum readable detail, clean edges and completely visible geometry.
ChatGPT will then generate an image resembling a professionally sculpted and painted 3D miniature.

Part 3 — Opening 3D AI Studio
Once the miniature render is ready, open 3D AI Studio and create an account.

Although the platform may offer introductory credits, a paid subscription is recommended when you want to experiment freely, generate several versions and compare different reconstruction models without constantly worrying about your remaining credits.
After entering the platform, select:
Image to 3D
This section allows you to upload a photograph, illustration, concept image or character render and convert it into a complete 3D model.

You will now enter the Image to 3D workspace.
Part 4 — Choosing the Reconstruction Model
At the top of the workspace, you will find the model selector.

3D AI Studio includes multiple reconstruction engines. They are designed for different types of objects, styles, levels of detail and generation speeds.

For this workflow, one of the models we particularly recommend is:
Hunyuan 3.1 Pro
Be careful with the spelling: it is Hunyuan

Hunyuan 3.1 Pro is designed to generate precise geometry, detailed meshes and clean model topology from image references. The platform recommends it as a reliable option when users want consistent image-to-3D results without needing to adjust a large number of technical parameters.
Part 5 — Generating the Model from One Image
We recommend beginning with the simplest workflow:
- Select Hunyuan 3.1 Pro.
- Upload the frontal or slightly three-quarter render created with ChatGPT.
- Check that the complete miniature is visible.
- Press the model-generation button.
- Wait for the reconstruction to finish.
- Inspect the generated model from every angle.
In many cases, one well-prepared image is enough to produce an excellent result.
 This is why the original render is so important. A clean silhouette, a neutral background, visible limbs and a balanced miniature base help the reconstruction engine understand the object more accurately.
Do not begin with multiple images unless they are necessary. First test the single-image method because it is faster, simpler and often produces a perfectly usable model.
Part 6 — Inspecting the First Reconstruction
Once the generation has finished, rotate the model inside the 3D viewer.
Examine:
- The face.
- The back of the head.
- The armour.
- The hands.
- The feet.
- The weapons.
- The shield.
- The cape.
- The connection between the character and the base.
- Any section that was hidden in the original image.
Pay particular attention to the back of the miniature. When a model is reconstructed from a single frontal image, the system must interpret or invent the areas that were not visible in the reference.

If the model looks correct, you can continue directly to the export stage.
If the back, side profile, weapons or accessories are not accurate enough, use the Multi-view workflow.
Part 7 — Creating the Additional Character Views
Return to ChatGPT and upload the 3D miniature render you previously generated.
We now need four additional images:
- Character’s right-side view.
- Character’s left-side view.
- Complete rear view.
- Complete top-down view.
These images must show the same miniature without changing its design or pose.
Use the following prompt:
Prompt — Generate Four Consistent Views
Use the uploaded front-view render as the only visual reference.
Create four separate full-body images of exactly the same miniature character, maintaining maximum visual consistency between every image.
Preserve exactly the same:
- character identity
- facial features
- anatomy
- body proportions
- pose
- hairstyle
- outfit
- armour
- clothing
- materials
- colours
- weapons
- shield
- accessories
- cape
- miniature base
- terrain elements
- decorative details
- rendering style
- lighting conditions
The character must remain in exactly the same pose in all four images.
Do not redesign, reinterpret, simplify, add, remove, replace or reposition any part of the miniature.
The character and the miniature base must remain completely static.
Only rotate the camera around the miniature.
Generate these four separate images:
IMAGE 1 — CHARACTER’S RIGHT-SIDE VIEW
Position the camera directly on the character’s right side.
Show a strict 90-degree right profile.
Do not use a three-quarter angle.
IMAGE 2 — CHARACTER’S LEFT-SIDE VIEW
Position the camera directly on the character’s left side.
Show a strict 90-degree left profile.
Do not use a three-quarter angle.
IMAGE 3 — COMPLETE REAR VIEW
Position the camera directly behind the character.
Show a perfectly centred 180-degree back view.
The character must be facing directly away from the camera.
IMAGE 4 — COMPLETE TOP-DOWN VIEW
Position the camera directly above the crown of the character’s head.
Look vertically downward at a strict 90-degree angle.
This must be a true bird’s-eye overhead view, not a high three-quarter view.
Maintain the same:
- scale
- camera distance
- lighting
- background
- rendering quality
- image resolution
- miniature proportions
The entire character, weapons, accessories, cape and miniature base must remain completely visible inside every frame.
Do not crop any part of the model.
OUTPUT REQUIREMENTS:
- Produce four individual image files.
- Do not create a collage.
- Do not create a contact sheet.
- Do not create a split-screen image.
- Do not place several views inside the same composition.
FINAL PRIORITY:
Maximum consistency between all views.
The result must look like the same unchanged physical 3D miniature photographed by four cameras positioned around it.
ChatGPT should now provide four separate images showing the miniature from the required angles.
Review them carefully before uploading them to the reconstruction platform.
Make sure that ChatGPT has not:
- Changed the pose.
- Swapped the sword and shield.
- Modified the base.
- Altered the cape.
- Added or removed accessories.
- Changed the armour.
- Modified the proportions.
- Mirrored asymmetrical elements incorrectly.
If one angle is inconsistent, regenerate only that image before continuing.

Part 8 — Using Hunyuan 3.1 Pro Multi-view
Return to 3D AI Studio and select:
Hunyuan 3.1 Pro — Multi-view
The Multi-view version allows the platform to reconstruct the same object using several images captured from different angles. According to the platform documentation, Hunyuan 3.1 Pro Multi-view can work with between one and eight assigned views.

Upload the images into their corresponding positions:
- Front view.
- Right-side view.
- Left-side view.
- Rear view.
- Top view.

The exact interface may vary as the platform is updated, but always assign each image to the correct camera direction.

Do not place the left-side image in the right-side slot. From the camera’s perspective, it can sometimes be easy to confuse the two.
After uploading all the images:
- Check that every view belongs to the same character.
- Verify that the pose is identical.
- Confirm that all weapons and accessories appear in the correct hand.
- Select the desired generation quality.
- Start the reconstruction.
Because the platform now has information about the front, sides, back and upper surfaces of the miniature, it no longer needs to invent as much hidden geometry.
The final result should therefore be more accurate and more consistent with the original design.
Part 9 — Single Image or Multi-view?
Use a single image when:
- The character has a simple silhouette.
- The pose is frontal or slightly three-quarter.
- The arms and legs are clearly separated.
- There are no complex elements behind the body.
- The first reconstruction already looks correct.
- You want the fastest workflow.
Use Multi-view when:
- The back of the character is important.
- The miniature has a cape, wings, tail or backpack.
- The weapons are partially hidden.
- The design is asymmetrical.
- The single-image reconstruction invents incorrect geometry.
- You need greater control and accuracy.
- You intend to produce a higher-quality physical miniature.
Our recommendation is always to begin with a single image.
When the result is already good, there is no reason to make the process more complicated. When one image is not enough, Multi-view becomes the most reliable solution.
Part 10 — Downloading the STL File
Once you are satisfied with the generated model, locate the Download option in the interface.

Select:
Download as STL
3D AI Studio supports direct STL export for 3D-printing workflows.

The STL file contains the geometry of the miniature and can be opened in a slicer such as:
- Lychee Slicer.
- Chitubox.
- PrusaSlicer.
- Cura.
- Anycubic Photon Workshop.
Remember that the STL file normally does not preserve colour textures. It contains the printable three-dimensional geometry.
Part 11 — Important Final Check Before Printing
Generating and downloading an STL does not automatically guarantee that the file is ready to send directly to the printer.
Before printing, inspect the model inside your slicer and check:
- The final scale.
- The dimensions of the base.
- Minimum wall thickness.
- Fragile weapons or accessories.
- Floating or disconnected geometry.
- Holes in the mesh.
- Inverted normals.
- Intersections between objects.
- Contact between the feet and the base.
- Resin drainage if the miniature is hollowed.
- Orientation.
- Supports.
Even 3D AI Studio’s own guidance recommends inspecting the mesh and repairing thin walls, flipped normals or other geometry issues before printing.
For a standard tabletop character, you could begin by testing a height of approximately 30–40 mm, although the appropriate size will depend on the game, pose and base.
Final Result
At the end of this process, you will have transformed:
An original 2D illustration
into:
A professional miniature-style 3D render
then into:
A reconstructed three-dimensional model
and finally into:
An STL file ready to prepare for physical 3D printing.
The complete workflow is:
2D illustration → miniature render → additional views → AI reconstruction → STL export → slicing → 3D printing
This process allows you to turn almost any original character into a physical miniature without needing to sculpt the entire model manually in professional 3D software.
For your complete satisfaction, I have included the full 3D AI Studio training course below, taken directly from the platform itself. It contains clear step-by-step explanations, practical guidance and video tutorials created by the 3D AI Studio team.
Everything has been brought together here so that you can access it easily, understand the entire process and learn at your own pace without having to search across different places.
Read every section carefully, watch all the YouTube videos and master the art of 3D reconstruction using some of the most powerful platforms and tools available online—all integrated into one convenient learning space.
It could not be easier.
Read, study, practise and become a true master of 3D reconstruction.
Getting Started
Updated May 2026
Welcome! This quickstart gets you from zero to a finished 3D model in about five minutes. Everything runs in your browser - no downloads, no installs, no credit card required.
1. Create your account
Go to 3daistudio.com and click Get Started. Sign up with email or Google - takes about 10 seconds. You get free credits immediately, so you can jump straight into generating.

The signup modal with email and social login options for creating your 3D AI Studio account.
2. Your Dashboard
After signing in you land on the Dashboard. This is home base - every model you generate shows up here as a card you can preview, download, or process further.

The 3D AI Studio dashboard showing your tools, recent generations, and model cards.
Look at the top-left corner for your credit balance. Credits are what you spend each time you generate a model. The free credits you got at signup are enough to try several generations.

The credit balance display in the top-left corner of the dashboard.
3. Your first Text to 3D model
Let’s generate something. Click Text to 3D in the sidebar (or go to /TextTo3D).
- Write a prompt - Describe what you want. Keep it specific: “a medieval treasure chest with gold trim” works better than “a chest”. Mention materials, style, and details.
-
Pick a model - You’ll see these options:
- Prism 3.1 - Best quality, 35 credits, 3-5 minutes
- Prism Turbo - Great balance of speed and quality, 25 credits, 50-90 seconds
- Swift - Fastest at 20-40 seconds (20 credits), lower detail - good for testing prompts quickly
- Hit Generate and wait for your model to appear.
Start with Prism Turbo if you want fast results with solid quality. Use Swift to iterate on prompt wording, then switch to Prism 3.1 for your final version.
Quick prompt tips:
- Be specific about materials: “brushed steel”, “weathered wood”, “matte ceramic”
- Mention style: “low-poly”, “realistic”, “stylized cartoon”
- See the full Prompt Tips guide for more
4. Your first Image to 3D model
Got a photo, sketch, or AI-generated image? You can turn it directly into a 3D model.
Click Image to 3D in the sidebar (or go to /ImageTo3D).
- Upload your image - Drag it in or click to browse. For best results, use a clear shot of a single object on a simple background.
- Choose your AI model - Same options as Text to 3D (Prism 3.1, Prism Turbo, or Swift).

The model selection grid showing available AI models for Image to 3D generation.
- Click Generate and watch the progress bar.

A generation in progress, showing the progress bar and estimated time.
Multi-image mode: Upload photos from multiple angles (front, side, back) and the AI combines them for a more accurate reconstruction. Great for real objects you’ve photographed.

The multi-image upload mode for combining photos from multiple angles into one 3D model.
5. Preview and export
Once generation finishes, your model appears in the built-in 3D viewer. Rotate by dragging, zoom with the scroll wheel.

The interactive 3D viewer showing a completed model you can rotate, zoom, and download.
Happy with the result? Download it in any format:
| Format | Best for |
|---|---|
| GLB | Web, AR, general use (default) |
| FBX | Unity, Unreal Engine, Maya |
| OBJ | Blender, ZBrush, universal |
| STL | 3D printing |
| USDZ | Apple AR (iPhone, iPad, Vision Pro) |
| BLEND | Native Blender projects |
| 3MF | Color 3D printing |
Click the Download button on your model card and pick the format you need. That’s it - your 3D model is ready to use.
6. Next steps
You’ve got the basics down. Here’s where to go from here:
- Image Studio - Generate and edit reference images before converting to 3D. This two-step workflow (perfect image first, then convert) gives you the most control over your final model.
- Prompt Tips - Write better prompts, get better models.
- Texture Generator - Add or swap PBR textures on any model.
- Workflow Examples - Full start-to-finish workflows for games, printing, e-commerce.
- Export & Formats - Detailed breakdown of every format and when to use it.
Questions? Join the Discord community or email support@3daistudio.com.
Frequently Asked Questions
Is 3D AI Studio free to use?
Yes, you can start for free. 3D AI Studio gives you free credits when you sign up, enough to generate several 3D models without entering a credit card. After your free credits are used, you can purchase more or subscribe to a plan for ongoing use.
How many free credits do you get with 3D AI Studio?
New accounts receive free credits on signup that let you try multiple generations right away. The exact amount may vary, but it is typically enough for 3-5 model generations depending on which AI model you choose. 3D AI Studio shows your credit balance in the top-left corner of the dashboard.
Do I need 3D modeling experience to use 3D AI Studio?
No experience needed at all. 3D AI Studio runs entirely in your browser - just type a description or upload an image and the AI generates a complete 3D model for you. There is no software to install and no technical knowledge required. The whole process takes about 2-5 minutes from signup to downloading your first model.
What are the system requirements for 3D AI Studio?
3D AI Studio runs in your web browser, so you do not need a powerful computer. Any modern browser (Chrome, Firefox, Safari, Edge) with WebGL support works. A stable internet connection is recommended since the AI processing happens on the server side, not on your device.
Which AI model should I pick for my first generation?
Start with Prism Turbo for a good balance of speed and quality at 25 credits. It generates in about 50-90 seconds. 3D AI Studio also offers Swift (20 credits, fastest, lower detail) for quick prompt testing, and Prism 3.1 (35 credits, best quality) for final production models.
What is the difference between Text to 3D and Image to 3D?
Text to 3D generates a model from a written description like “a medieval treasure chest with gold trim.” Image to 3D converts a photo, sketch, or illustration into a 3D model. In 3D AI Studio, Image to 3D generally produces more accurate results when you have a specific look in mind, while Text to 3D is great for quick concept exploration.
Can I use 3D AI Studio models commercially?
Yes. Models you generate with 3D AI Studio are yours to use in commercial projects, including games, apps, product visualization, and 3D printing. Check the terms of service on 3daistudio.com for the full details on licensing and usage rights.
How is 3D AI Studio different from other AI 3D generators?
3D AI Studio offers multiple AI models to choose from (Prism, Swift, Hunyuan, Trellis), built-in tools for texturing, rigging, remeshing, and format conversion, plus direct integrations with Blender, Unity, Unreal Engine, and more. It is an all-in-one platform rather than just a single generation tool. You can go from prompt to game-ready asset without leaving the site.
What file formats can I download my models in?
3D AI Studio supports 9 export formats: GLB, FBX, OBJ, STL, USDZ, BLEND, 3MF, Collada (.dae), and PLY. GLB is the default and works almost everywhere. Use FBX for game engines, STL for 3D printing, and USDZ for Apple AR. See the Export Formats page for a detailed comparison.
Recommended Workflow
Updated May 2026
The best 3D models don’t come from typing a prompt into Text to 3D. They come from creating a good reference image first, then converting that image to 3D. This two-step approach gives you way more control over the final result.
This page shows you exactly how to do it, with real examples.
Why Image First?
When you use Text to 3D directly, the AI has to imagine what your object looks like based on words alone. Sometimes it nails it, sometimes it doesn’t. And if the result is close but not quite right, you have to rewrite the prompt and try again.
With the image-first workflow, you can:
- See the result before committing to 3D - if the image doesn’t look right, edit it
- Control exactly what the model looks like - colors, style, angle, details
- Use photos of real objects - not just text descriptions
- Edit yourself into the scene - turn a selfie into a figurine, LEGO character, etc.
The 3D conversion step is the same either way (Image to 3D with Prism 3.1). The difference is how good your input is.
Workflow 1: Generate an Image, Then Convert to 3D
This is the most common workflow. You create a clean reference image in Image Studio, then send it to Image to 3D.
Steps
- Open Image Studio and go to Generate
- Pick a model (ImageGen 4 for general use, Flux 2 for photorealism)
- Write a prompt describing what you want, with “clean white background” and “single object”
- Generate until you get an image you like
- Open Image to 3D
- Upload the generated image
- Pick Prism 3.1 and generate
Real example: Owl character
Here’s what this looks like in practice. We generated an owl character image, then converted it to 3D:
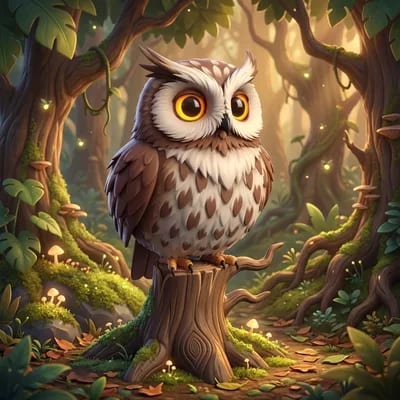
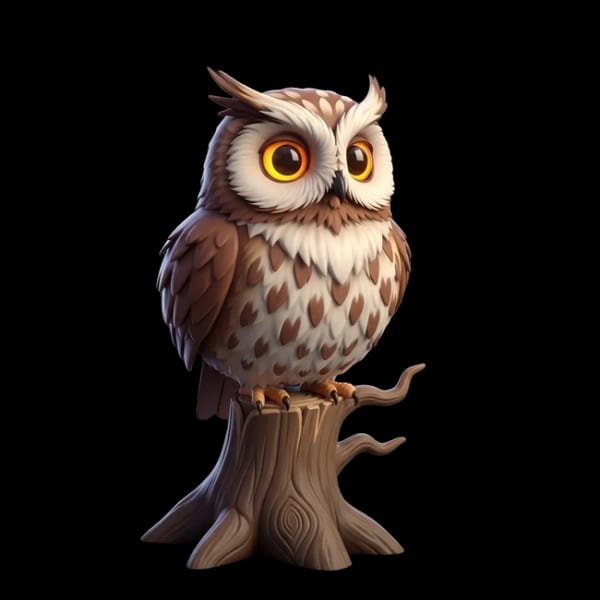
Generated with “stylized 3D cartoon owl, soft lighting, clean white background”, then converted to 3D with Prism 3.1.
More examples
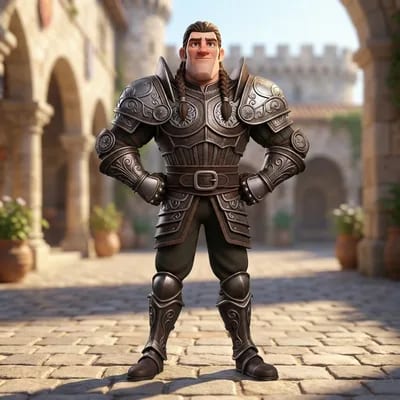
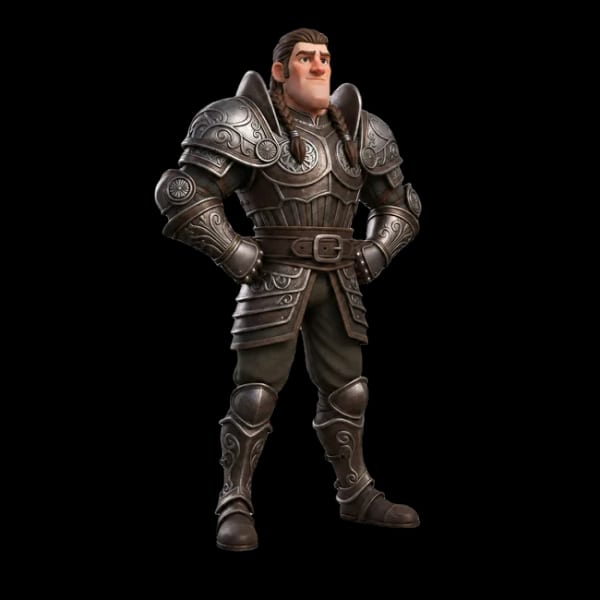
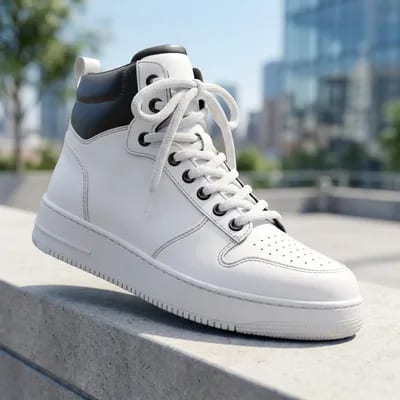
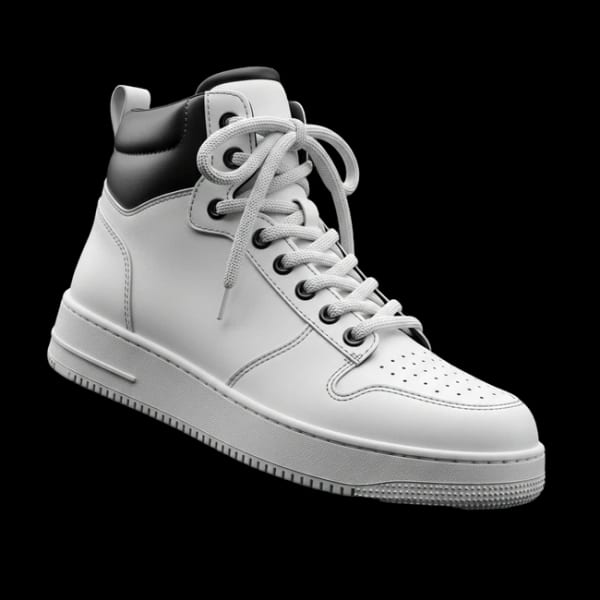
The pattern is the same every time: generate a clean image with one subject, simple background, good lighting, then convert to 3D.
Tips for generating good reference images
- Add “clean white background” or “studio lighting” to your prompt
- Include “single object, centered” to keep it simple
- Use “3D render style” or “stylized 3D” for images that convert better than flat illustrations
- Generate a few variations and pick the best one before converting to 3D
- If the image is almost right, edit it in Image Studio before converting (see Workflow 2)
Workflow 2: Edit a Photo, Then Convert to 3D
Already have a photo? You can edit it into something that converts to 3D really well. This is especially useful for personalized figurines, product models, or turning real objects into 3D.
Steps
- Open Image Studio and go to Edit
- Upload your photo
- Pick GPT-Image-2 Edit or Gemini Edit
- Write an edit prompt (e.g. “turn this person into a LEGO minifigure, plastic material, clean background”)
- Download the edited image
- Open Image to 3D and upload it
- Generate with Prism 3.1
Real example: Photo to LEGO figurine to 3D print
This is the full pipeline. We took a regular photo, edited it into a LEGO-style figurine, converted to 3D, and 3D printed the result:
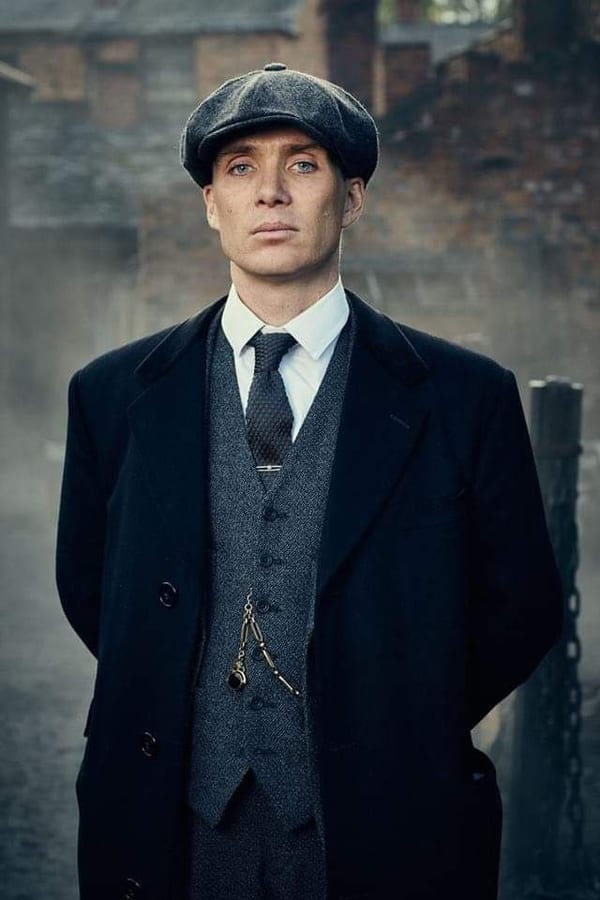
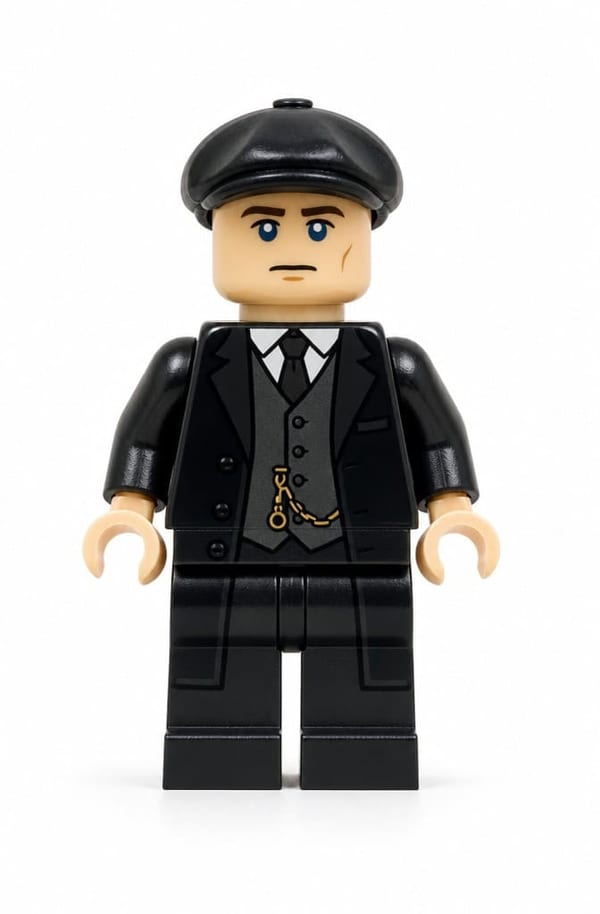
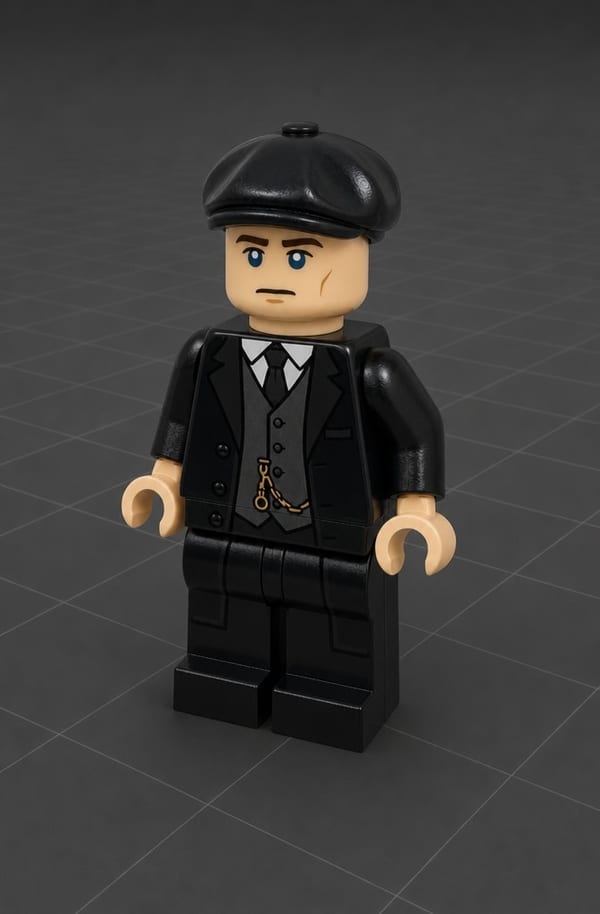
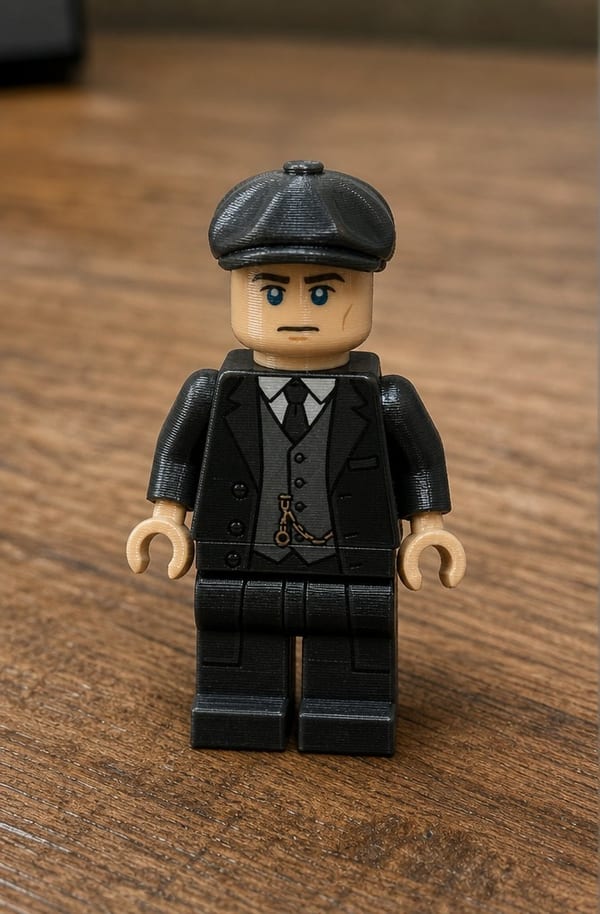
Photo, AI edit, 3D model, 3D print. The whole thing takes about 5 minutes (not counting print time).
Real example: Generated LEGO orc
You can also combine Workflow 1 and 2. Here we generated a LEGO orc from scratch in Image Studio, then converted to 3D:
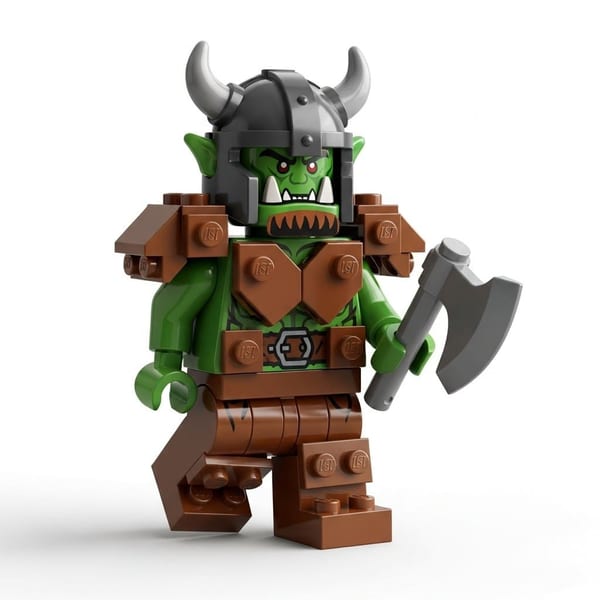
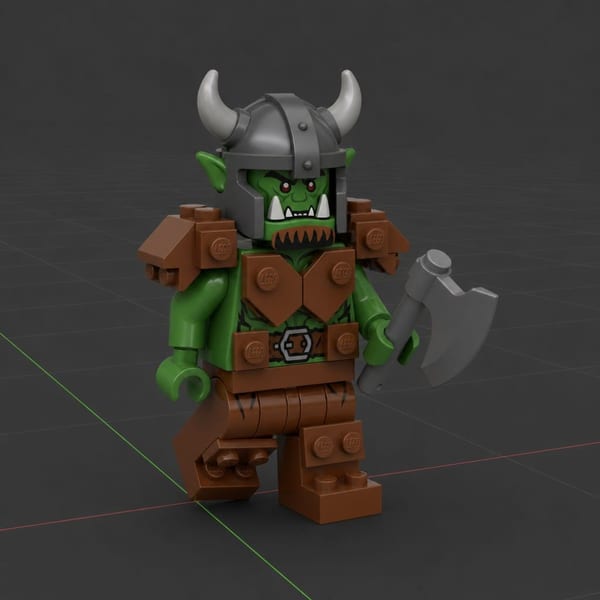
The prompt was something like “LEGO minifigure of an orc warrior, green skin, armor, plastic material, studio lighting, white background” using ImageGen 4.
Good edit prompts for 3D conversion
| What you want | Edit prompt |
|---|---|
| LEGO figurine of yourself | ”turn this person into a LEGO minifigure, plastic material, blocky proportions, full body, clean background” |
| Pixar-style character | ”turn into a Pixar-style 3D character, stylized, big eyes, clean background” |
| Funko Pop figurine | ”turn me into a Funko Pop figurine, full body, clean background” |
| Clean product shot | ”remove the background, keep the product exactly as is, white background” |
| Stylized 3D version | ”turn into a stylized 3D render, clean lighting, white background” |
Workflow 3: Sketch to 3D
Have a hand-drawn sketch or concept drawing? You can turn it into a full 3D model by rendering it first in Image Studio.
Steps
- Open Image Studio and go to Edit
- Upload your sketch (photo of a drawing, digital sketch, or rough concept)
- Use GPT-Image-2 Edit or Gemini Edit with a prompt like “render this sketch as a detailed 3D model, stylized, clean background”
- The AI turns your rough sketch into a polished, render-ready image
- Upload that rendered image to Image to 3D
- Generate with Prism 3.1
Real example: Orc character from sketch
A rough pencil sketch becomes a fully rendered character, then a 3D model:
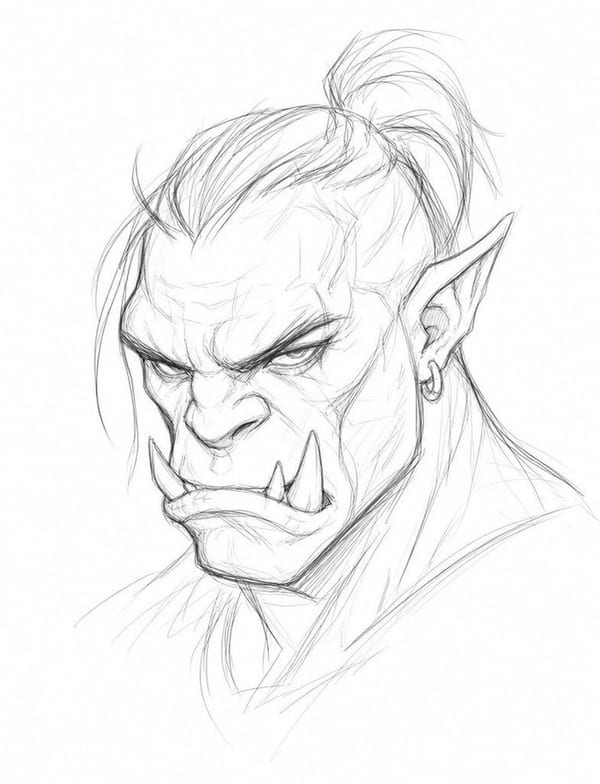
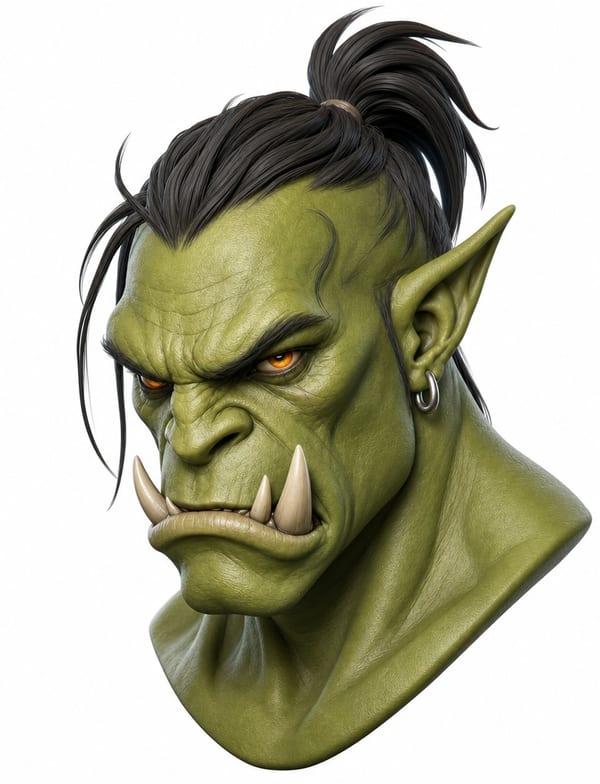
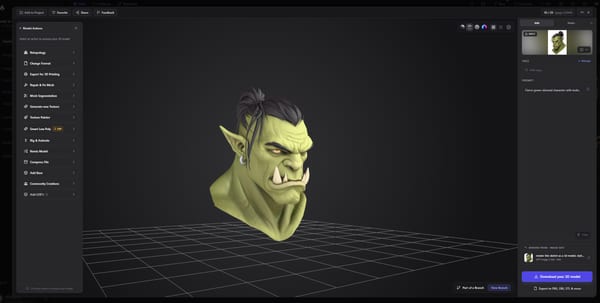
Sketch, AI render, 3D model. The rough pencil drawing was uploaded to Image Studio Edit with the prompt “render this sketch as a 3D model, stylize”. The AI produced the detailed character render. That render was then uploaded to Image to 3D with Prism 3.1 to get the final 3D model.
Tips for sketch to 3D
- Clean line art works best - clear outlines with minimal construction marks
- Add basic shading to your sketch if possible - it helps the AI understand depth and volume
- Three-quarter angles convert better than straight front views
- Digital sketches tend to work better than photos of paper drawings (less noise)
- If your sketch is on paper, photograph it with even lighting and crop tightly around the subject
Workflow 4: Direct Photo to 3D (Quick and Simple)
If you just want a quick 3D model from an existing photo without editing, you can skip Image Studio and go straight to Image to 3D:
- Open Image to 3D
- Upload your photo
- Pick Prism 3.1 (or Prism Turbo for speed)
- Generate
This works well for:
- Product photos with clean backgrounds
- Concept art and illustrations
- Toys and objects photographed on a table
- Character art and drawings
It works less well for:
- Photos with busy backgrounds (edit first to remove the background)
- Multiple objects in one image (crop to just one)
- Very dark or blurry photos (edit first to improve quality)
When to Use Text to 3D Instead
Text to 3D is still useful when:
- You want a quick concept and don’t care about exact appearance
- You’re exploring ideas and want fast iterations
- The object is simple enough to describe in words (a sword, a potion bottle, a chair)
- You don’t have any reference image at all
But for anything where the look matters, the image-first workflow will save you time and give you better results.
Quick Reference
| Situation | Workflow | Time |
|---|---|---|
| I have an idea but no image | Generate image in Image Studio, then Image to 3D | ~5 min |
| I have a photo of myself | Edit photo in Image Studio, then Image to 3D | ~5 min |
| I have a sketch or drawing | Render sketch in Image Studio Edit, then Image to 3D | ~5 min |
| I have a product photo | Upload directly to Image to 3D (or remove background first) | ~3 min |
| I have concept art | Upload directly to Image to 3D | ~3 min |
| I want a quick rough model | Text to 3D directly | ~3 min |
| I want to 3D print a figurine | Edit photo to figurine style, Image to 3D, export STL | ~10 min |
Watch the full Image to 3D workflow in action.
Open Image Studio - Open Image to 3D - Open Text to 3D
Frequently Asked Questions
Why is image-first better than text to 3D directly?
When you type a prompt into Text to 3D, the AI has to guess what your object looks like. With the image-first workflow in 3D AI Studio, you see the exact reference image before spending credits on 3D generation. You can edit colors, fix proportions, remove backgrounds, and iterate cheaply on the 2D image until it’s perfect. This leads to far more predictable 3D results.
How many credits does the full image-first workflow cost?
A typical run in 3D AI Studio costs around 40-50 credits total. Image generation is about 5-10 credits depending on the model, and Image to 3D with Prism 3.1 costs 35 credits. That’s slightly more than Text to 3D alone (25-60 credits), but you get much more control over the outcome. Image editing adds another 5-10 credits if needed.
What is the best workflow to generate a 3D model with AI?
The best approach in 3D AI Studio is the image-first workflow. Instead of going straight to Text to 3D, generate a reference image first in Image Studio, edit it until it looks exactly right, then convert it to a 3D model using Image to 3D. This gives you much more control over the final result because you can perfect the 2D image cheaply before committing credits to 3D generation. Image generation costs 2-8 credits while 3D generation costs 25-60, so iterating in 2D saves both time and credits.
Can I turn a hand-drawn sketch into a 3D model?
Yes, and it works surprisingly well. Upload your sketch to Image Studio Edit in 3D AI Studio and use a prompt like “render this sketch as a detailed 3D model, clean background.” The AI turns your rough drawing into a polished render, which you then convert to 3D with Image to 3D. Clean line art with some basic shading converts best.
What’s the best image generation model for 3D conversion?
ImageGen 4 in 3D AI Studio works great for stylized and cartoon objects. Flux 2 is better for photorealistic subjects. Both produce images that convert well to 3D. The key is adding “clean white background” and “single object, centered” to your prompt regardless of which model you pick.
How do I turn a selfie into a 3D figurine?
Upload your photo to Image Studio Edit in 3D AI Studio and use a prompt like “turn this person into a LEGO minifigure, plastic material, full body, clean background.” Once the edited image looks good, send it to Image to 3D with Prism 3.1. Export as STL for 3D printing. The entire process takes about 5 minutes.
Does this workflow work for game assets?
Absolutely. Many game developers use 3D AI Studio’s image-first workflow to rapidly prototype assets. Generate a concept in Image Studio with style keywords like “low-poly” or “game asset,” then convert to 3D with Prism 3.1 or Tripo P1 Game Ready. The output can go straight into Unity or Unreal after a quick retopology pass if needed.
What image backgrounds work best for 3D conversion?
Solid white or transparent backgrounds give the best results in 3D AI Studio. Studio lighting setups also work well. The goal is to isolate your subject clearly so the AI doesn’t create unwanted geometry from background elements. If your source image has a busy background, use Image Studio’s background removal tool before converting.
Can I combine workflows for complex objects?
Yes, many users mix approaches in 3D AI Studio. For example, you might generate a character’s body with the image-first workflow, then generate accessories separately with Text to 3D, and combine everything in Blender. You can also generate multiple angle references in Image Studio and use a multi-view model for more accurate reconstruction.
How long does the entire recommended workflow take?
From start to finished 3D model, the image-first workflow in 3D AI Studio typically takes about 5 minutes of active work. Image generation takes seconds, editing (if needed) takes a minute or two, and Prism 3.1 generates the 3D model in 3-5 minutes. Direct photo to 3D (without editing) is even faster at about 3 minutes total.
What if my generated image isn’t perfect?
That’s the beauty of the image-first approach. In 3D AI Studio, you can edit the generated image before converting to 3D. Fix colors, remove unwanted details, change the background, or adjust proportions using Image Studio Edit. Each edit costs only 5-10 credits, which is much cheaper than regenerating the entire 3D model if something is off.
Image to 3D
Image to 3D takes a regular photo or illustration and turns it into a fully textured 3D model - geometry, colors, and materials included. You upload an image, pick an AI model, and get a downloadable 3D asset in minutes (or seconds, depending on the model). It works with product photos, character art, concept sketches, or really anything visual.
Uploading Your Image
Getting started is simple. You have three ways to add your image:
- Drag and drop - Pull any PNG, JPG, or WebP file directly onto the upload area
- Browse - Click the upload area to open your file picker
- Paste - Copy an image to your clipboard and paste it straight in (Ctrl+V / Cmd+V)
The image appears as a preview thumbnail so you can confirm it looks right before generating.
Choosing the Right Model
With 12 single-image models available, picking the right one matters. Here are quick recommendations:
- Best overall - Prism 3.1 (default for a reason - great balance of speed, quality, and cost)
- Fastest results - Prism Turbo (under 90 seconds, good for rapid iteration)
- Best for games - Tripo P1 Game Ready (optimized topology, 60-90 seconds)
- Highest quality - Hunyuan 3.1 Pro (state of the art detail and textures)
- Best value - Trellis 2 (starts at just 15 credits)
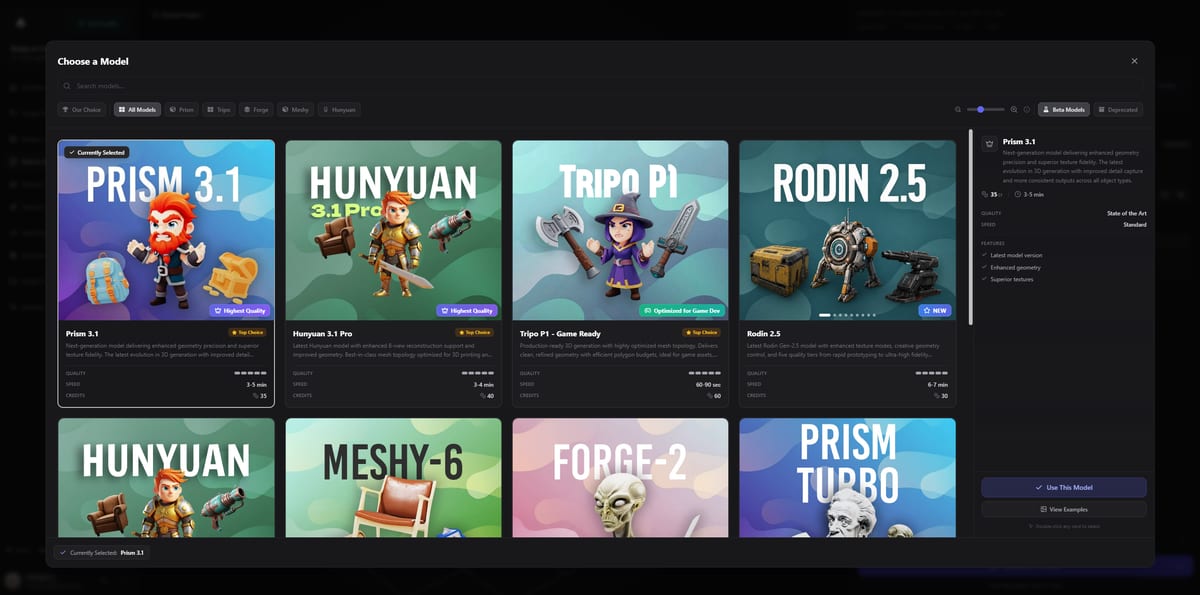
The model picker in Image to 3D, showing all available AI models with their credit costs and quality tiers.
Single-Image Models
All single-image models work from one photo. Upload your image, hit generate, and the AI figures out the full 3D shape from that single viewpoint.
| Model | Credits | Speed | Quality | Time |
|---|---|---|---|---|
| Prism 3.1 (default) | 35 | Standard | State of the Art | 3-5 min |
| Hunyuan 3.1 Pro | 40 | Standard | State of the Art | 3-4 min |
| Tripo P1 - Game Ready | 60 | Fast | State of the Art | 60-90 sec |
| Meshy 6 | 40 | Standard | Good | 5-10 min |
| Trellis 2 | 15-41 | Standard | High | 4-8 min |
| Rodin 2.5 | 30 | Fast-Standard | State of the Art | 6-7 min |
| Forge Gen-2 | 35 | Standard | State of the Art | 5-7 min |
| Hunyuan 3.0 | 40 | Standard | State of the Art | 3-4 min |
| Prism Turbo | 25 | Fastest | High | 50-90 sec |
| Prism 3.0 | 30 | Standard | State of the Art | 2-4 min |
| CSM | 35 | Standard | State of the Art | 4-6 min |
| Seed3D 1.0 | 30 | Standard | High | 8-12 min |
Seed3D 1.0 is currently in beta and available on paid plans only.
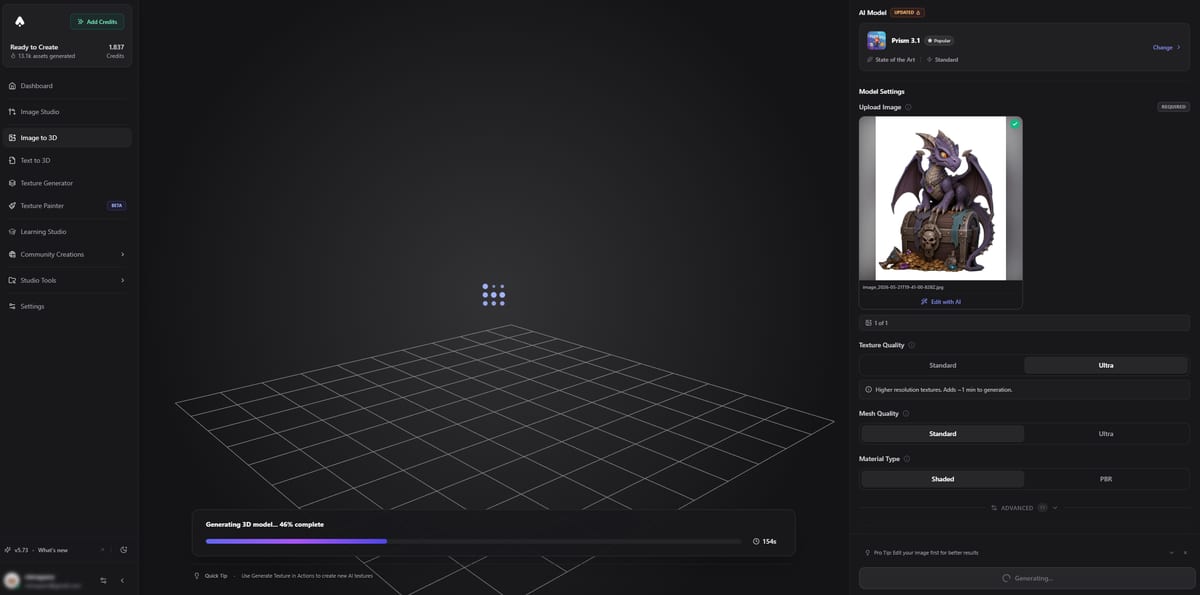
A model generation in progress, showing the real-time status indicator and estimated time remaining.
Multi-Image / Multi-View Models
When a single photo isn’t enough - say you have a product shot from multiple angles or a character turnaround sheet - multi-image models give you significantly more accurate results. They combine information from several viewpoints to reconstruct geometry that’s correct from every angle.
There are two input types depending on the model:
- Fixed views - The model expects specific angles (front, left, back, right). You assign each image to its slot.
- Flexible multi-image - Upload 1-8 images from any angles. The model figures out the spatial relationships.
Multi-image models are available on paid plans only.
| Model | Credits | Input Type | Time |
|---|---|---|---|
| Prism 3.1 Multi-view | 40 | 4 fixed views (front/left/back/right) | 3-5 min |
| Hunyuan 3.1 Pro Multi-view | 45 | 1-8 assigned views | 3-4 min |
| Tripo P1 Multi-view | 65 | 4 fixed views | 60-90 sec |
| Meshy 6 Multi-image | 45 | 1-4 images | 5-10 min |
| Rodin 2.5 Multi-image | 35 | 2-5 images | 6-7 min |
| Forge Gen-2 Multi-image | 40 | 2-5 images | 5-7 min |
| Hunyuan 3.0 Multi-view | 45 | 4 views | 3-4 min |
| Prism 3.0 Multi-view | 35 | 4 fixed views | 2-4 min |
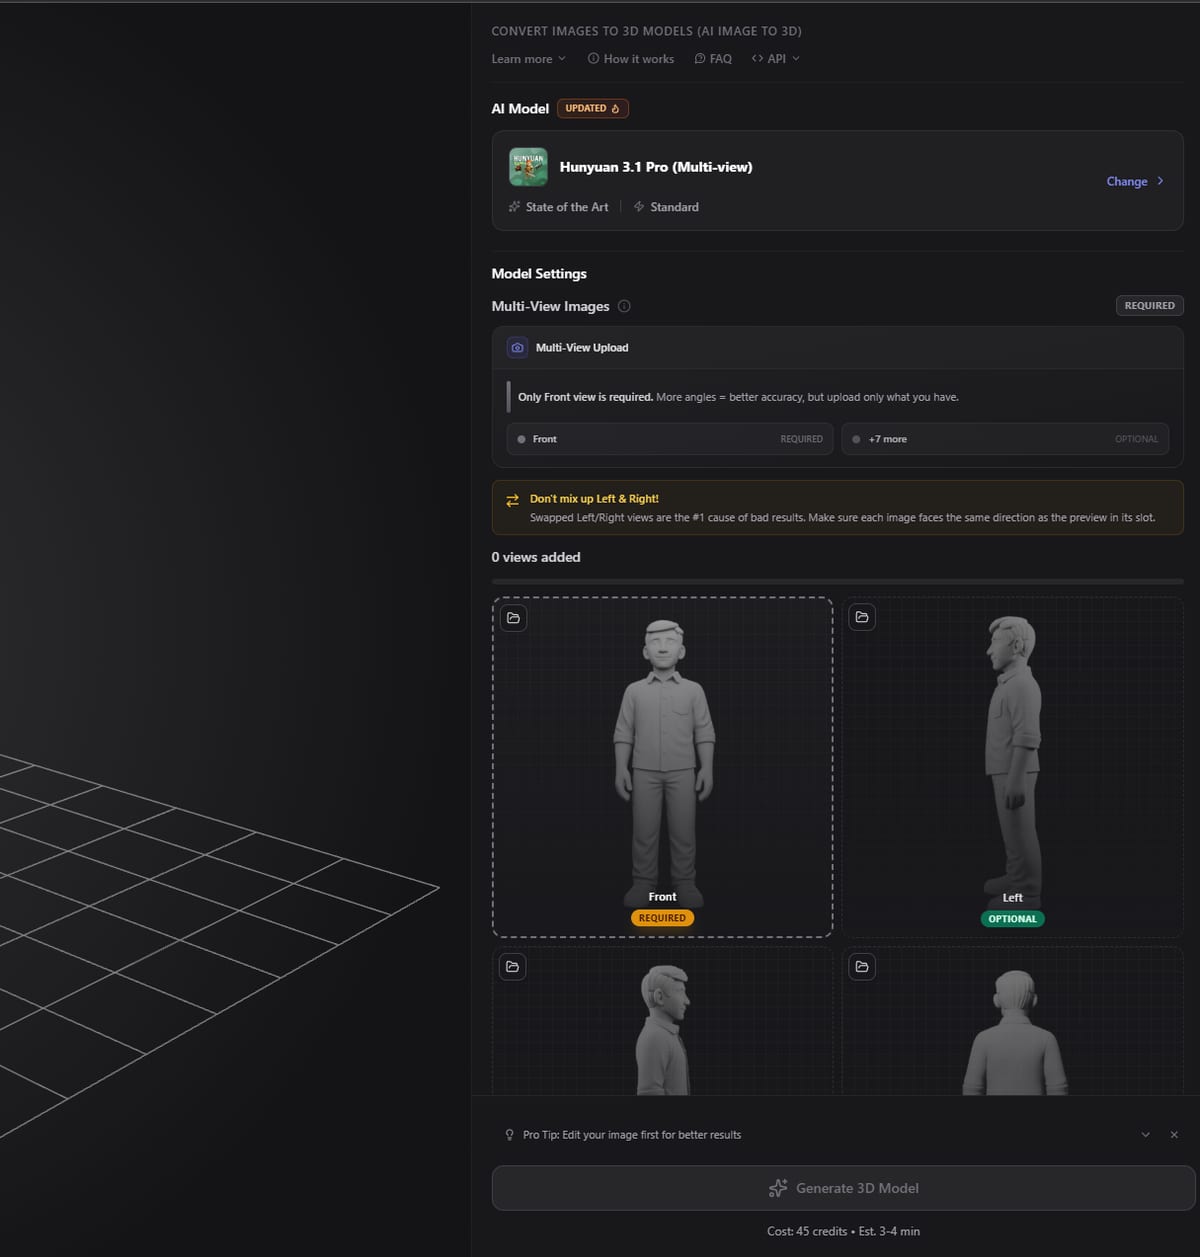
The multi-image upload interface, where you assign photos to specific viewpoints for more accurate 3D reconstruction.
Settings and Options
Depending on the model you pick, you’ll see different settings on the right panel. Here’s what the common ones do:
- Texture quality - Controls the resolution of the generated texture maps. Higher means sharper details but slightly longer processing.
- Mesh quality - Affects polygon density. Higher quality means smoother surfaces and better small details.
- PBR materials - When enabled, the model generates normal, roughness, and metallic maps alongside the base color texture. Essential for realistic rendering in game engines and 3D apps.
- Face limit - Sets the maximum polygon count. Lower values produce lighter meshes that load faster; higher values capture finer detail. Useful when targeting specific platforms.
- Seed - A number that makes generation reproducible. Same image + same seed + same settings = same result every time.
- Auto-size - Scales the output model to realistic physical dimensions based on what the AI thinks the object is.
Export Formats
Once your model is ready, you can download it in multiple formats directly from the 3D viewer:
- GLB - Universal format, works everywhere (Blender, Unity, Unreal, web viewers)
- FBX - Industry standard for game engines and animation pipelines
- OBJ - Simple and widely supported, good for static meshes
- STL - For 3D printing (geometry only, no textures)
- USDZ - Apple AR Quick Look format
All formats include textures where applicable. PBR maps export as separate image files when downloading OBJ or FBX.
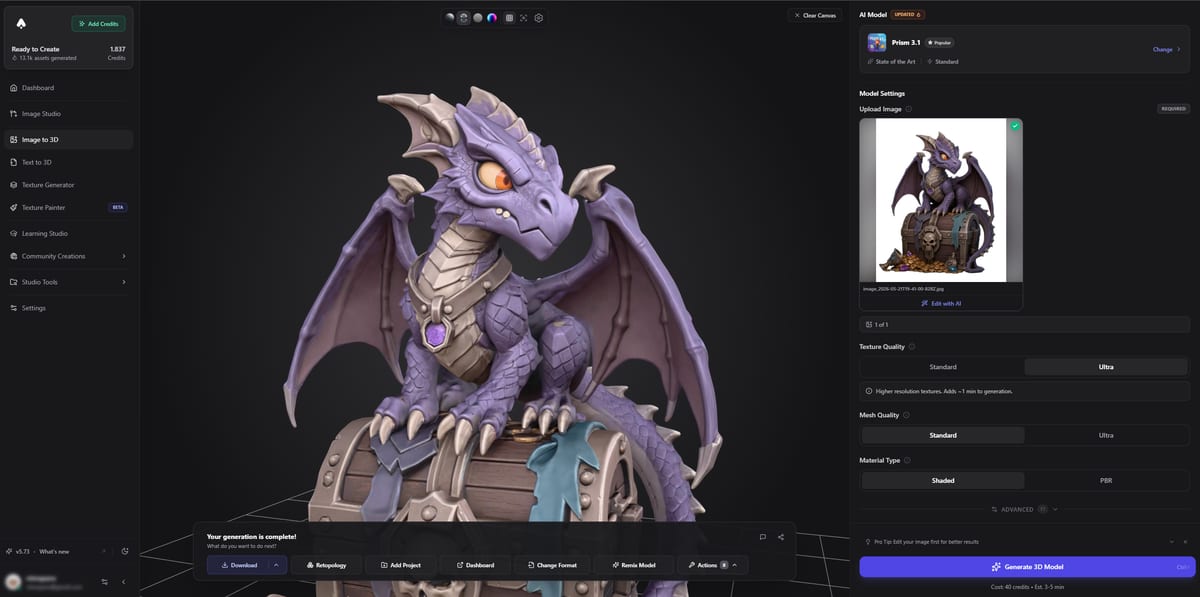
The built-in 3D viewer displaying a completed model, with format options for downloading.
Tips for Best Results
A few things that consistently improve output quality:
- Clean backgrounds - Solid or simple backgrounds help the AI focus on your subject. Busy scenes can create unwanted geometry around the edges.
- Good lighting - Even, well-lit photos give the AI more color and surface information to work with. Avoid harsh shadows or overexposed areas.
- Sharp images - Motion blur and compression artifacts reduce quality. Use the highest resolution source you have.
- Center your subject - The object should fill most of the frame without being cropped.
- Simple angles work best - For single-image mode, a slight 3/4 view (showing front and one side) gives the AI more depth cues than a perfectly flat front-on shot.
- Multi-image consistency - When using multi-view models, keep the same lighting, distance, and background across all your photos. Inconsistency confuses the reconstruction.
- Remove backgrounds first - If your photo has a cluttered background, consider removing it before uploading. The Image Studio has a one-click background removal tool that works great for this.
What’s Next
Ready to try it out? Open the Image to 3D generator and upload your first image — free credits on signup. If you’d rather start from a text description instead, check out the Text to 3D guide.
Last updated: May 2026
Frequently Asked Questions
What image format works best for AI 3D conversion?
PNG with a transparent or solid white background gives the cleanest results in 3D AI Studio. JPG and WebP also work fine, but avoid heavily compressed images since compression artifacts can show up as bumps or noise in the final 3D mesh. The higher the resolution, the better the textures will be.
Can I use photos taken with my phone for image to 3D?
Yes, phone photos work well as long as the subject is in focus and well-lit. In 3D AI Studio, models like Prism 3.1 handle phone photos with ease. Just make sure the object fills most of the frame and the background isn’t too cluttered. A simple trick is to photograph your object on a white table or sheet.
How accurate is AI 3D reconstruction from a single photo?
Single-image models in 3D AI Studio are surprisingly good at inferring the back and hidden sides of objects, but they’re making educated guesses. For objects with complex backsides (like a detailed sculpture), you’ll get better accuracy using multi-view models with 2-8 photos from different angles. Simple, symmetrical objects like bottles or cars reconstruct well from a single shot.
Does image to 3D preserve textures and colors?
Yes, all models in 3D AI Studio generate colored textures mapped onto the mesh. If you enable PBR materials, you also get normal maps, roughness maps, and metallic maps for realistic rendering in game engines. The texture quality depends on your input image resolution and the quality settings you choose.
How long does image to 3D generation take?
It depends on the model. Prism Turbo is the fastest at 50-90 seconds, while Meshy 6 can take 5-10 minutes. The default Prism 3.1 in 3D AI Studio typically finishes in 3-5 minutes. Higher quality settings and ultra texture options add some extra time.
Is there a free option for image to 3D?
3D AI Studio gives you free credits when you sign up, which is enough to test several generations. After that, models range from 15 credits (Trellis 2) to 65 credits (Tripo P1 Multi-view). There’s no free unlimited tier, but the free signup credits let you try it with no commitment.
Should I remove the background before uploading?
It’s not required, but it helps a lot. A cluttered background can confuse the AI into creating unwanted geometry around your subject. 3D AI Studio’s Image Studio has a one-click background removal tool you can use before converting to 3D. If your photo already has a clean, simple background, you can skip this step.
Can I use image to 3D models for 3D printing?
Absolutely. Export as STL from 3D AI Studio and import directly into your slicer (Cura, PrusaSlicer, etc.). For best printing results, choose a model with higher mesh quality settings and consider using the Quad Remesh tool to clean up the topology before printing. Solid, chunky objects print better than thin, delicate ones.
What’s the difference between single-image and multi-view models?
Single-image models take one photo and guess the full 3D shape, which works great for most objects. Multi-view models in 3D AI Studio accept 2-8 photos from different angles and combine them for much more accurate geometry. Use multi-view when precision matters, like product models or characters where the back needs to look exactly right.
Do I need a transparent background for 3D conversion?
A transparent background is ideal but not strictly required. What matters most in 3D AI Studio is that the background is simple and doesn’t distract from your subject. A solid white, gray, or transparent background all work well. Avoid photos with other objects, complex patterns, or gradients in the background.
Text to 3D
Text to 3D lets you generate full 3D models just by describing what you want. Type a prompt, pick a model, and get a textured 3D asset you can download and use in games, renders, or any 3D project. It’s the fastest way to go from an idea to a 3D model without any modeling skills.
Writing Good Prompts
Your prompt is the single biggest factor in getting a great result. Here are some practical tips:
- Be specific - describe the object, its materials, style, and key features
- Mention the view - “full body”, “side view”, or “isometric” helps the AI frame it right
- Include style keywords - “realistic”, “low-poly”, “cartoon”, “PBR” guide the output
- Keep it focused - describe one object clearly rather than a complex scene
Example prompts that work well:
| Use Case | Prompt |
|---|---|
| Architecture | ”medieval castle with stone walls and a tall tower” |
| Character | ”cute chibi anime cat girl, big eyes, full body” |
| Weapon/Prop | ”futuristic sci-fi pistol, metallic, detailed” |
| Vehicle | ”red sports car, glossy paint, side view” |
The model selection grid in 3D AI Studio, showing available Text to 3D models with credit costs and quality ratings.
Choosing the Right Model
With 10 models available, picking the right one depends on what you need:
- Best overall quality - Prism 3.1 (default for a reason) or Hunyuan 3.1 Pro
- Fastest results - Prism Turbo (under 90 seconds) or Tripo P1
- Game-ready assets - Tripo P1 Game Ready delivers clean topology fast
- Budget-friendly - Prism Turbo at 25 credits is the cheapest option
- Maximum detail - Hunyuan 3.1 Pro or Forge Gen-2 for complex objects
Model Comparison
Here’s every available model with current specs as of May 2026:
| Model | Credits | Speed | Quality | Generation Time |
|---|---|---|---|---|
| Prism 3.1 (Default) | 35 | Standard | State of the Art | 3-5 min |
| Hunyuan 3.1 Pro | 40 | Standard | State of the Art | 3-4 min |
| Tripo P1 - Game Ready | 60 | Fast | State of the Art | 60-90 sec |
| Meshy 6 | 40 | Standard | Good | 5-10 min |
| Rodin 2.5 | 30 | Fast-Standard | State of the Art | 6-7 min |
| Forge Gen-2 | 35 | Standard | State of the Art | 5-7 min |
| Hunyuan 3.0 | 40 | Standard | State of the Art | 3-4 min |
| Prism Turbo | 25 | Fastest | High | 50-90 sec |
| Prism 3.0 | 30 | Standard | State of the Art | 2-4 min |
| CSM | 35 | Standard | State of the Art | 4-6 min |
Settings and Options
Each model family has its own set of options you can tweak before generating:
Prism models:
- Texture quality - standard or ultra (+5 credits for ultra)
- Mesh quality - standard or ultra (+10 credits for ultra)
- PBR toggle - enables physically-based rendering textures
- Face limit - control polygon count for your use case
- Style presets - quick shortcuts for common art styles
Hunyuan models:
- Generation type - Normal, Geometry Only, Sketch, or LowPoly
- PBR toggle - full PBR material maps
- Max face count - adjustable from 40k up to 1.5M faces
Meshy 6:
- Art style - realistic or sculpture
- Topology - triangle or quad mesh
- Remesh option - cleaner topology for animation
- Symmetry toggle - useful for characters and vehicles
- Character pose - set a default pose for characters
Tripo P1 - Game Ready:
- Texture on/off - with texture costs 60 credits, without texture costs 40 credits
Rodin 2.5:
- Quality tiers - from extreme-low to extreme-high
- HighPack addon - adds 4K textures for +10-15 credits
A 3D model generation in progress with the real-time status indicator.
The Workflow
Generating a model is straightforward:
- Type your prompt - describe what you want to create
- Pick a model - choose based on your speed/quality/budget needs
- Adjust settings - tweak texture quality, face count, or style options
- Hit Generate - the model starts processing (time varies by model)
- Preview your result - rotate, zoom, and inspect in the 3D viewer
- Export - download in your preferred format
A completed 3D model displayed in the interactive viewer, ready for export.
Export Formats
Once your model is ready, you can download it in multiple formats:
- GLB/GLTF - best for web, AR, and general use
- FBX - standard for game engines (Unity, Unreal)
- OBJ - universal format, works everywhere
- STL - for 3D printing (no textures)
- USDZ - Apple AR Quick Look
The format you choose depends on where you plan to use the model. GLB is the safest all-rounder, FBX is ideal for game pipelines, and STL is what you want for 3D printing.
Pro tip: For maximum control over your results, generate an image first in Image Studio using the same prompt. Edit and perfect the image until it looks exactly right, then use Image to 3D to convert it. This two-step approach gives you much more control over the final 3D model - and image generation is cheaper, so you can iterate freely before committing credits to 3D.
Ready to generate? Try the Text to 3D generator — free credits on signup.
Last updated: May 2026
Frequently Asked Questions
Is text to 3D really free?
3D AI Studio gives you free credits when you sign up, so you can generate several models at no cost. After that, models range from 25 credits (Prism Turbo) to 60 credits (Tripo P1 Game Ready). There’s no unlimited free tier, but the signup credits are enough to test different models and see which one you prefer.
Which text to 3D model is fastest?
Prism Turbo is the fastest model in 3D AI Studio at under 90 seconds, costing just 25 credits. Tripo P1 Game Ready is a close second at 60-90 seconds but costs 60 credits and produces game-optimized topology. If you need quick iterations to nail a design, Prism Turbo is your best bet.
Can AI generate game-ready 3D models from text?
Yes. Tripo P1 Game Ready in 3D AI Studio is specifically optimized for clean topology suitable for game engines. It produces models with proper edge flow in 60-90 seconds. For other models, you can use the Quad Remesh tool afterward to optimize the mesh for Unity or Unreal Engine.
How do I get PBR textures on text to 3D models?
Toggle the PBR option in the settings panel before generating. In 3D AI Studio, Prism 3.1 and Hunyuan models support full PBR output including base color, normal, roughness, and metallic maps. When you export as FBX or OBJ, the PBR maps download as separate texture files ready for any game engine or renderer.
What’s the maximum polygon count for generated models?
It varies by model. Hunyuan 3.1 Pro in 3D AI Studio supports up to 1.5 million faces, while most other models default to around 40k-100k faces. You can set a face limit before generating to target your platform requirements. Lower face counts work better for mobile games and web, while higher counts suit film and high-end renders.
Is text to 3D better than image to 3D?
They serve different purposes. Text to 3D in 3D AI Studio is faster when you just need a quick model from an idea. Image to 3D gives you more control because you can see and edit the reference image first. For best results, many users generate an image in Image Studio, refine it, then convert to 3D. This two-step approach costs slightly more credits but produces more predictable results.
How much does text to 3D cost per model?
In 3D AI Studio, prices range from 25 credits for Prism Turbo up to 60 credits for Tripo P1 Game Ready. The most popular option, Prism 3.1, costs 35 credits. Add-ons like ultra texture quality (+5 credits) or ultra mesh quality (+10 credits) increase the cost slightly. One credit purchase goes a long way since you get models that would take hours to create manually.
Can I use a style preset with text to 3D?
Yes. Prism models in 3D AI Studio offer style presets that act as shortcuts for common art directions. These presets adjust internal parameters to bias the output toward a specific look (cartoon, realistic, low-poly, etc.) without you needing to describe the style in your prompt. Just select a preset from the dropdown and type what you want to create.
What’s the best prompt length for text to 3D?
Keep it between 5 and 20 words for best results. In 3D AI Studio, overly long prompts with paragraph-length descriptions tend to confuse the models and produce messy results. A focused prompt like “medieval castle with stone walls and a tall tower” works much better than a 50-word description trying to specify every detail.
Can text to 3D make multiple objects at once?
It’s best to generate one object at a time. When you ask for multiple objects in a single prompt (like “a sword and a shield”), 3D AI Studio models tend to merge them into a messy combined mesh. Instead, generate each object separately and combine them in your 3D software afterward. This gives you clean, individual assets you can position exactly how you want.
SVG to 3D: Turn Vector Files into 3D Models
Updated May 2026
The SVG to 3D tool takes any SVG file and extrudes it into a 3D model - right in your browser. Everything runs client-side, so your files never leave your computer. It’s completely free, no credits or signup required.
It works great for logos, icons, typography, and brand assets. You get a live 3D preview with full material and lighting controls, then export as GLB (3D model) or PNG (transparent screenshot).
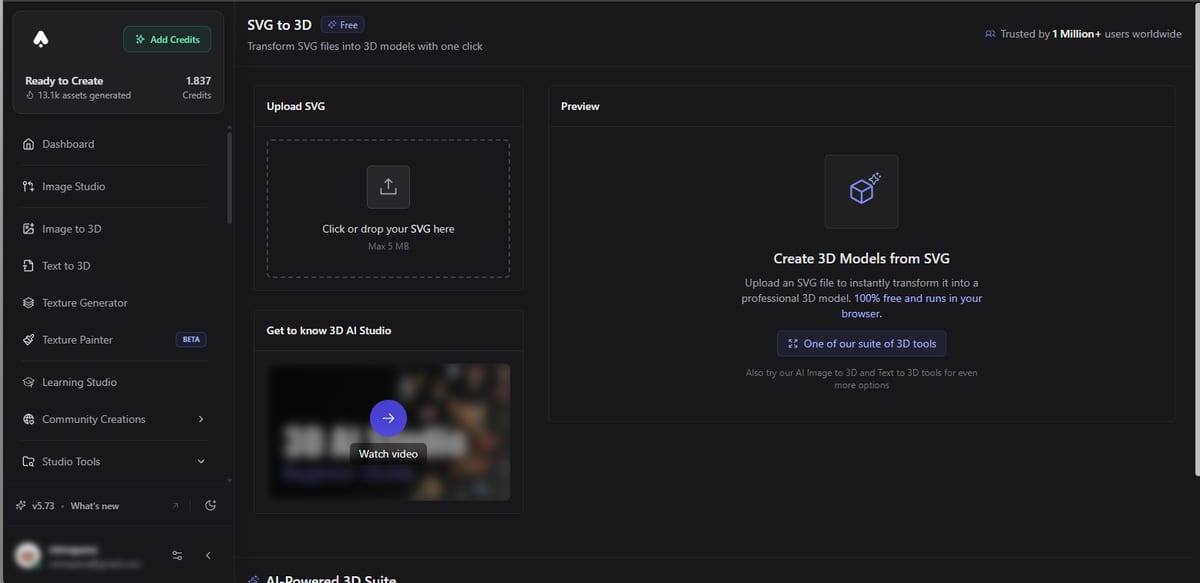
The SVG to 3D upload area, ready for you to drag and drop an SVG file.
How to Use It
1. Upload your SVG
Drag and drop an SVG file onto the upload area, or click to browse. Max file size is 5MB.
2. Preview in 3D
Your SVG appears as an extruded 3D model with a live preview you can rotate, zoom, and pan. The tool preserves your original SVG colors by default.
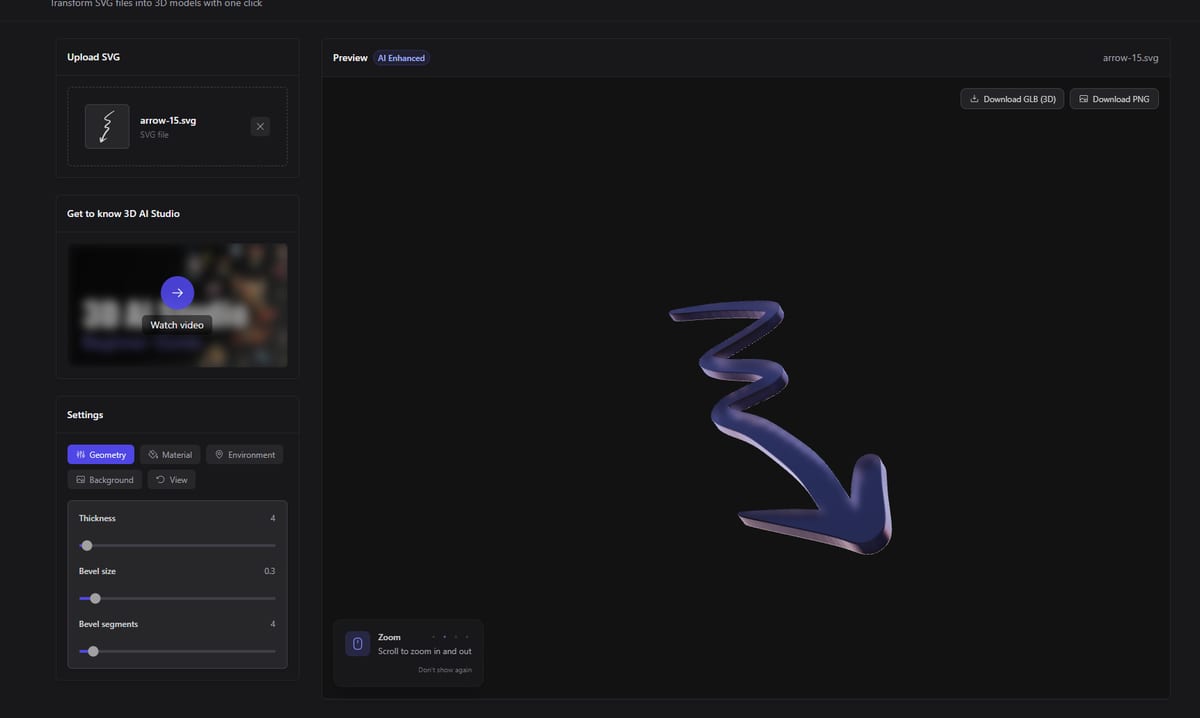
An SVG file loaded and extruded into a 3D model with a live interactive preview.
3. Adjust settings
Use the settings panel to tweak thickness, materials, lighting, and more. Changes show up instantly in the preview.
4. Export
Download your result as a GLB file for use in 3D apps, games, or AR - or grab a transparent PNG for presentations and marketing materials.
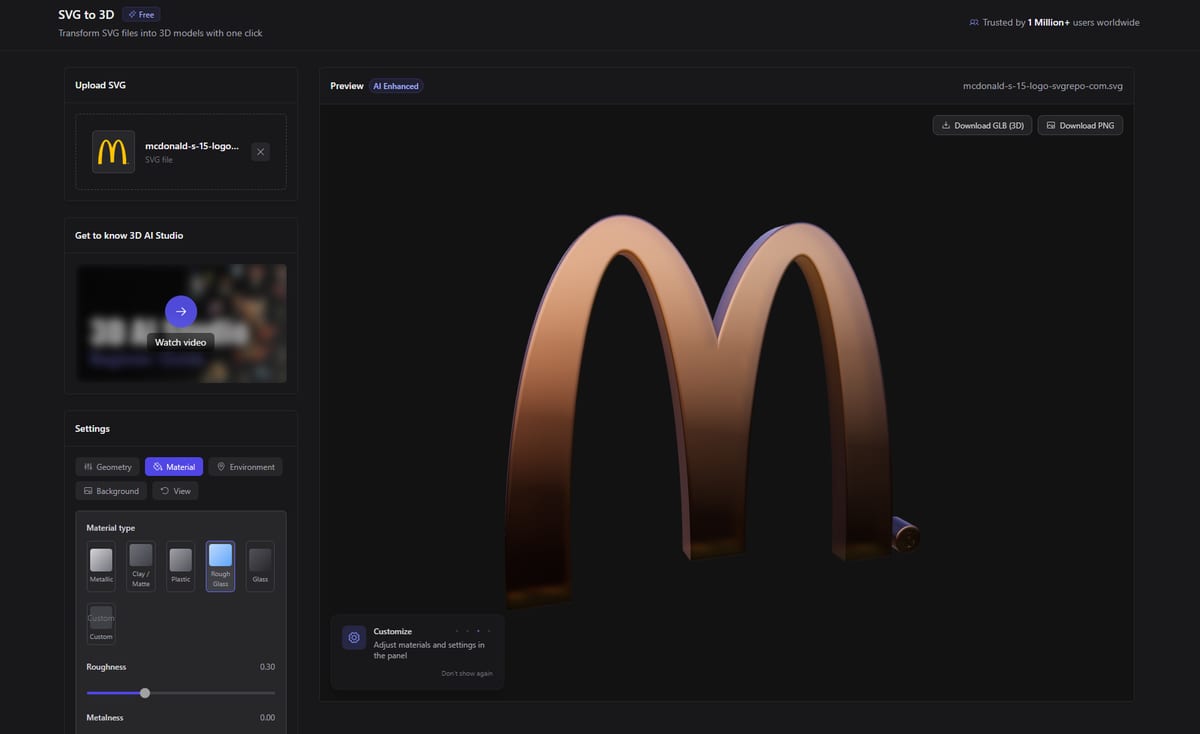
Another SVG to 3D example showing a different design with customized material and lighting.
Settings
The settings panel has five tabs. Here’s what each one does:
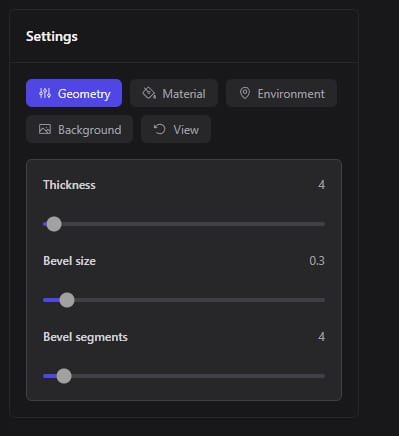
The settings panel with tabs for geometry, material, environment, background, and view controls.
Geometry
Controls the shape of the extrusion.
- Thickness (1-250, default 4) - How deep the extrusion goes. Higher values give a chunkier, more solid look.
- Bevel size (0-5, default 0.3) - Rounds off the edges. A small bevel adds realism; zero gives you sharp edges.
- Bevel segments (1-64, default 4) - How smooth the bevel curve is. More segments = smoother rounding.
Material
Pick a look or build your own.
- Presets - Choose from Metallic, Clay/Matte, Plastic, Rough Glass, Glass, or Custom
- Roughness - How shiny or matte the surface is
- Metalness - Metal vs non-metal appearance
- Clearcoat - Adds a glossy clear layer on top (like car paint)
- Transmission - Makes the material see-through (for glass effects)
- Override SVG colors - Replace the original SVG colors with a single material color
Environment
Sets the lighting around your model.
- HDRI presets - City, Dawn, Forest, Lobby, or Studio lighting
- Custom color - Use a solid color background for lighting instead of an HDRI
- Intensity - How bright the environment lighting is
- Bloom - Adds a soft glow effect around bright areas
Background
Pick a background color for the viewport using the color picker.
View
- Auto-rotate - Slowly spins the model so you can see all sides
- Rotation speed - How fast it spins
Material Presets
Not sure which material to use? Here’s a quick guide:
| Preset | Best for |
|---|---|
| Metallic | Logos, badges, premium brand assets |
| Clay/Matte | Clean mockups, 3D printing previews |
| Plastic | Icons, playful designs, product viz |
| Rough Glass | Frosted or etched effects |
| Glass | Transparent overlays, decorative pieces |
| Custom | Full control over every slider |
Export Options
Both export options run entirely in your browser - nothing gets uploaded.
- GLB - A standard 3D file format. Works in Blender, Unity, Unreal, web viewers, and AR apps. This is your go-to if you need the actual 3D model.
- PNG - A transparent-background screenshot of the current view. Great for slide decks, social media, and marketing materials where you just need a good-looking render.
Tips for Best Results
Which SVGs work best
- Simple, clean paths with solid fills - logos, icons, and text work great
- SVGs with well-defined shapes and clear outlines extrude cleanly
- Bold, thick designs look better in 3D than very thin, delicate linework
Getting cleaner output
- Start with a small thickness value and increase gradually
- Add a slight bevel (0.2-0.5) to make edges catch light naturally
- If your SVG has many tiny details, simplify it in a vector editor first
- Try different HDRI presets - lighting makes a big difference in how materials read
Common issues
- Very complex SVGs with hundreds of paths may render slowly - simplify them if you can
- Overlapping paths can create odd geometry - flatten or merge paths in your vector editor before uploading
- If colors look wrong, check whether “Override SVG colors” is turned on in the Material tab
Use Cases
- Logos for 3D websites - Export a GLB of your logo and embed it in a Three.js or model-viewer scene
- Icons for games - Extrude UI icons or item symbols for use in Unity or Unreal
- Brand assets for AR - Turn brand marks into AR-ready GLB files for product packaging or experiences
- Social media content - Export a styled PNG render of your logo for posts and thumbnails
- 3D printing - Extrude a design, export the GLB, and import it into your slicer
What’s Next
Ready to try it? Head to the SVG to 3D Converter and drop in an SVG. If you want to generate 3D models from images instead, check out the Image to 3D guide. For text-based generation, see Text to 3D.
Frequently Asked Questions
Is the SVG to 3D converter really free?
Yes, completely free with no signup, no credits, and no limits. The SVG to 3D tool in 3D AI Studio runs entirely in your browser, so nothing gets uploaded to a server. You can convert as many SVG files as you want and export GLB or PNG files without any account.
Can I convert a logo to a 3D model with this tool?
Absolutely. Logos are one of the best use cases for the SVG to 3D tool in 3D AI Studio. Just export your logo as an SVG from Illustrator, Figma, or any vector editor, then upload it. The tool extrudes it into 3D with customizable depth, materials, and lighting. Export as GLB for web 3D viewers or AR experiences.
What’s the difference between GLB and PNG export?
GLB gives you an actual 3D model file you can import into Blender, Unity, Unreal, or any web-based 3D viewer. PNG gives you a transparent screenshot of the current view, which is great for presentations, social media, or mockups. Both exports in 3D AI Studio’s SVG to 3D tool are free and run locally in your browser.
Why does my SVG look wrong after extrusion?
Complex SVGs with overlapping paths or very thin strokes can produce odd geometry. Before uploading to 3D AI Studio, try flattening or merging overlapping shapes in your vector editor. Also check if “Override SVG colors” is accidentally enabled in the Material tab, which replaces your original colors with a single uniform color.
Can I use the exported GLB for 3D printing?
Yes, but you’ll need to convert the GLB to STL first. Export the GLB from 3D AI Studio’s SVG to 3D tool, then import it into Blender or an online converter to save as STL. For best printing results, use a bold font or thick-stroked design, increase the extrusion depth to at least 5, and add a slight bevel so edges aren’t razor-sharp.
What SVG file size and complexity limits should I know about?
The max file size is 5MB. In practice, most logos and icons in 3D AI Studio’s SVG to 3D tool are well under this. However, very complex SVGs with hundreds of tiny paths (like detailed illustrations) may render slowly or produce messy geometry. For best results, keep your SVG simple with clean, well-defined shapes and merge unnecessary paths before uploading.
3D Text & Logo Maker
Updated May 2026
Turn any text into an extruded 3D model directly in your browser. Pick a font, adjust the depth and material, and export as GLB or PNG. Everything runs locally - nothing gets uploaded to a server. Free, no credits, no signup.
Open the 3D Text and Logo Maker

The 3D Text tool with default settings, showing extruded text in the live preview.
How It Works
- Type your text - enter any text in the text field. Supports multiple lines (use Shift+Enter for new lines).
- Pick a font - choose from 16 built-in fonts or upload your own TTF/WOFF2 file.
- Adjust the look - change depth, bevel, materials, lighting, and colors in real time.
- Export - download as GLB (3D model) or PNG (transparent render).
The 3D preview updates instantly as you change settings. Rotate, zoom, and pan the model with your mouse.

Custom text rendered in 3D with adjusted font, depth, and material settings.
Settings
The settings panel has 7 tabs:
Text
Type your text and choose alignment (left, center, right). Multi-line text is supported.
Typography

The typography settings panel with controls for font, size, depth, letter spacing, and bevel.
| Setting | Range | What it does |
|---|---|---|
| Font | 16 built-in + custom upload | Choose the typeface |
| Size | 1-50 | How large the text appears |
| Depth | 0.5-100 | How far the text extrudes into 3D |
| Line Height | 0.5-3 | Spacing between lines |
| Letter Spacing | 0-10 | Gap between characters |
| Curve Segments | 1-64 | Smoothness of curved letters |
Bevel (optional) adds rounded edges to the text. When enabled:
- Bevel Thickness (0-2)
- Bevel Size (0-2)
- Bevel Segments (1-16) - higher = smoother bevel
Available Fonts
Roboto, Open Sans, Bahiana, Caveat, Doto, Doto Bold, Doto Rounded, Kablammo, Lobster, Nova Mono, Rationale, Silkscreen, Silkscreen Bold, Space Grotesk, Space Grotesk Bold, Train One
Want a different font? Click “Upload your own” and select any TTF or WOFF2 file from your computer.
Geometry
- Spread (0-100) - expands or contracts the shapes
- Invert Depth - flips the extrusion direction
- Invert Mask - cuts the text shape out of a background rectangle
Material

3D text with a different material preset applied, showing how materials change the overall look.
Five presets to choose from:
| Preset | Look | Best for |
|---|---|---|
| Metallic | Shiny metal surface | Logos, premium branding |
| Clay / Matte | Soft, non-reflective | Prototypes, clean renders |
| Plastic | Slight sheen, subtle reflection | Product mockups |
| Rough Glass | Frosted translucent | Artistic, decorative |
| Glass | Clear transparent | Special effects, overlays |
Or go custom with individual sliders for roughness, metalness, clearcoat, and transmission. You can also override the text color with any custom color.
Environment
Choose how the scene is lit:
- HDRI mode - pick from 5 environment presets: City, Dawn, Forest, Lobby, Studio
- Color mode - set a single light color
- Adjust intensity (0-3)
- Optional bloom effect for a soft glow
Background
Pick any background color. Default is dark (#121212). Reset to default with one click.
View
- Auto-rotate toggle with adjustable speed (0.1-5)
Export
Two export options, both free:
| Format | What you get | Best for |
|---|---|---|
| GLB | 3D model file with materials | Web viewers, AR, game engines, 3D printing |
| PNG | Transparent screenshot of the current view | Social media, presentations, marketing |
Export buttons appear in the top-right corner of the preview panel.
Tips
- For 3D printing - use a bold font with thick strokes (Silkscreen Bold, Space Grotesk Bold). Increase depth to at least 5. Export GLB and convert to STL using the Quad Remesh Tool.
- For web/AR - keep curve segments low (4-8) for smaller file sizes. GLB works directly in most web 3D viewers.
- For transparent PNGs - set the background to a dark color, adjust lighting for the look you want, then export as PNG. The background will be transparent.
- Multi-line text - use Shift+Enter to add line breaks. Adjust line height to control spacing.
- Custom branding - upload your brand font (TTF/WOFF2), set your brand colors, and use the metallic or plastic preset for a professional look.
Use Cases
- Social media headers - create 3D text renders for YouTube thumbnails, Instagram posts, Twitter banners
- Logo mockups - extrude your logo text in 3D with different materials and lighting
- Game UI - generate 3D text for game titles, menus, and HUD elements
- Presentations - add 3D text renders to slides for visual impact
- 3D printing - print custom name plates, signs, and decorative text
Open the 3D Text and Logo Maker
Frequently Asked Questions
Is the 3D text generator completely free?
Yes, 100% free with no signup, no credits, and no usage limits. The 3D Text tool in 3D AI Studio runs entirely in your browser, so your text never leaves your computer. You can create and export as many GLB or PNG files as you want without paying anything.
Can I use my own custom font for 3D text?
Yes. Click “Upload your own” in the typography settings and select any TTF or WOFF2 font file from your computer. 3D AI Studio’s 3D Text tool renders it instantly in 3D with all the same customization options as the built-in fonts. This is great for brand-specific typography.
How do I export 3D text for 3D printing?
Export as GLB from 3D AI Studio’s 3D Text tool, then convert to STL using a tool like Blender or the Quad Remesh tool on the platform. For best printing results, use a bold font with thick strokes (like Silkscreen Bold or Space Grotesk Bold), set the depth to at least 5, and increase curve segments for smoother letters.
Can I create multi-line 3D text?
Yes. Press Shift+Enter to add line breaks in the text input field. 3D AI Studio’s text tool renders each line in 3D, and you can adjust the line height setting to control spacing between lines. Text alignment (left, center, right) applies to all lines.
What’s the best material preset for logo mockups?
Metallic works best for premium, corporate logo presentations. It catches light beautifully and gives a polished, professional feel. For a softer look, try Clay/Matte in 3D AI Studio’s 3D Text tool. Plastic adds a subtle sheen that works well for playful or consumer brands. You can also go fully custom with individual sliders for roughness, metalness, and clearcoat.
Can I use the GLB file in web-based 3D viewers?
Yes. GLB is the standard format for web 3D and works directly with Three.js, model-viewer, Babylon.js, and most web-based viewers. Export your 3D text from 3D AI Studio, upload the GLB to your server, and embed it in any webpage. Keep curve segments low (4-8) for smaller file sizes that load faster on the web.
3D Relief Generator
Updated May 2026
The Relief Generator turns any photo into a 3D relief sculpture - the kind of raised surface you see on coins, decorative panels, and carved plaques. Upload an image, and AI converts it into a depth map that becomes printable 3D geometry. The output works for 3D printing, CNC milling, and laser engraving.
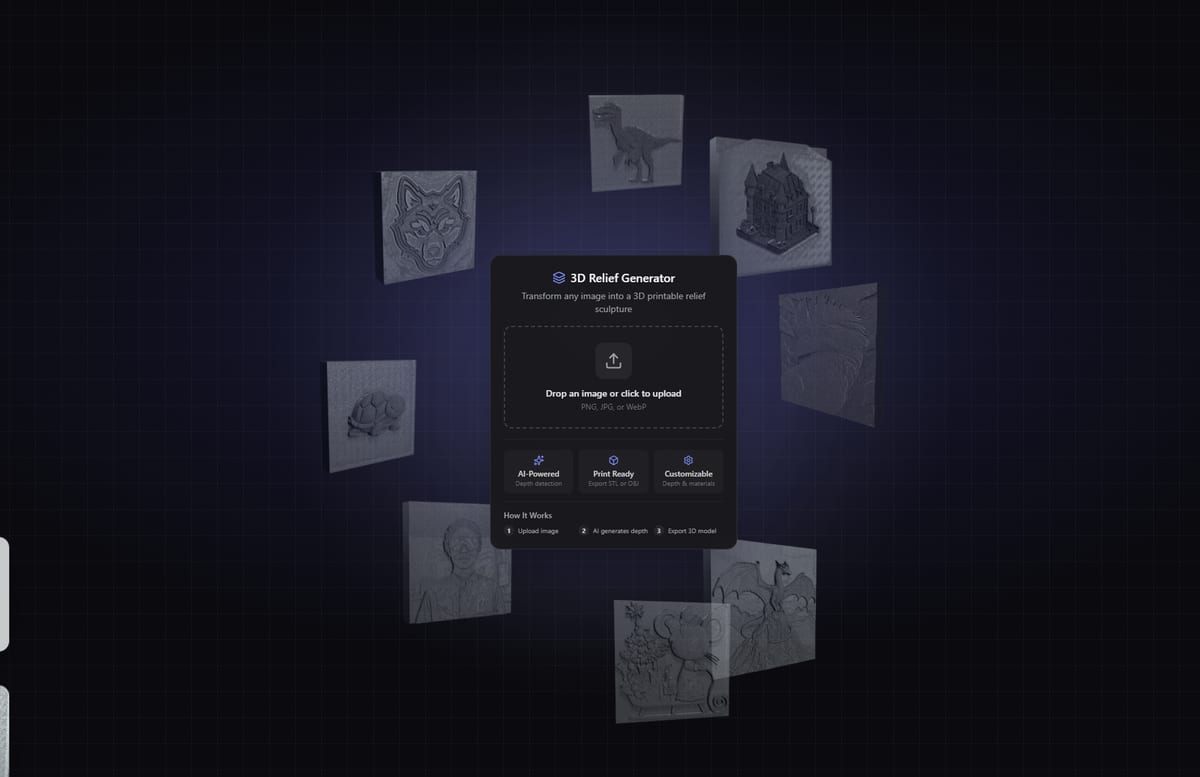
The Relief Generator landing view with floating example relief sculptures.
How It Works
The tool uses a two-stage process:
- Depth map generation (server-side) - AI analyzes your photo and produces a grayscale height map where bright areas become raised surfaces and dark areas stay flat. This step costs credits.
- Mesh building (client-side) - Your browser instantly converts that depth map into a 3D mesh you can rotate, adjust, and export. No extra credits needed for tweaking settings.
This means you can regenerate the depth map once and then experiment with dozens of different 3D settings for free.
Choosing a Depth Style
Before generating, pick a depth style that matches your image:
- Detailed - Best for objects, logos, architecture, and anything with sharp edges or fine surface detail. Preserves crisp lines and small features.
- Organic - Best for portraits, animals, and smooth natural shapes. Produces gentler depth transitions that avoid harsh artifacts on skin and curved surfaces.
If you’re unsure, try Detailed first. Switch to Organic if the result looks too noisy or harsh on smooth areas.
AI Models
| Model | Credits | Max Resolution | Best For |
|---|---|---|---|
| Nano Banana 2 | 4 | 2K | General use, fast results |
| Gemini Edit | 4 | 2K | Fine detail, complex scenes |
| Nano Banana Pro | 6-12 | 4K | High-res prints, large reliefs |
Nano Banana Pro supports 4K resolution but doubles in cost (12 credits) at that setting. For most projects, 1K or 2K at 4 credits is plenty.
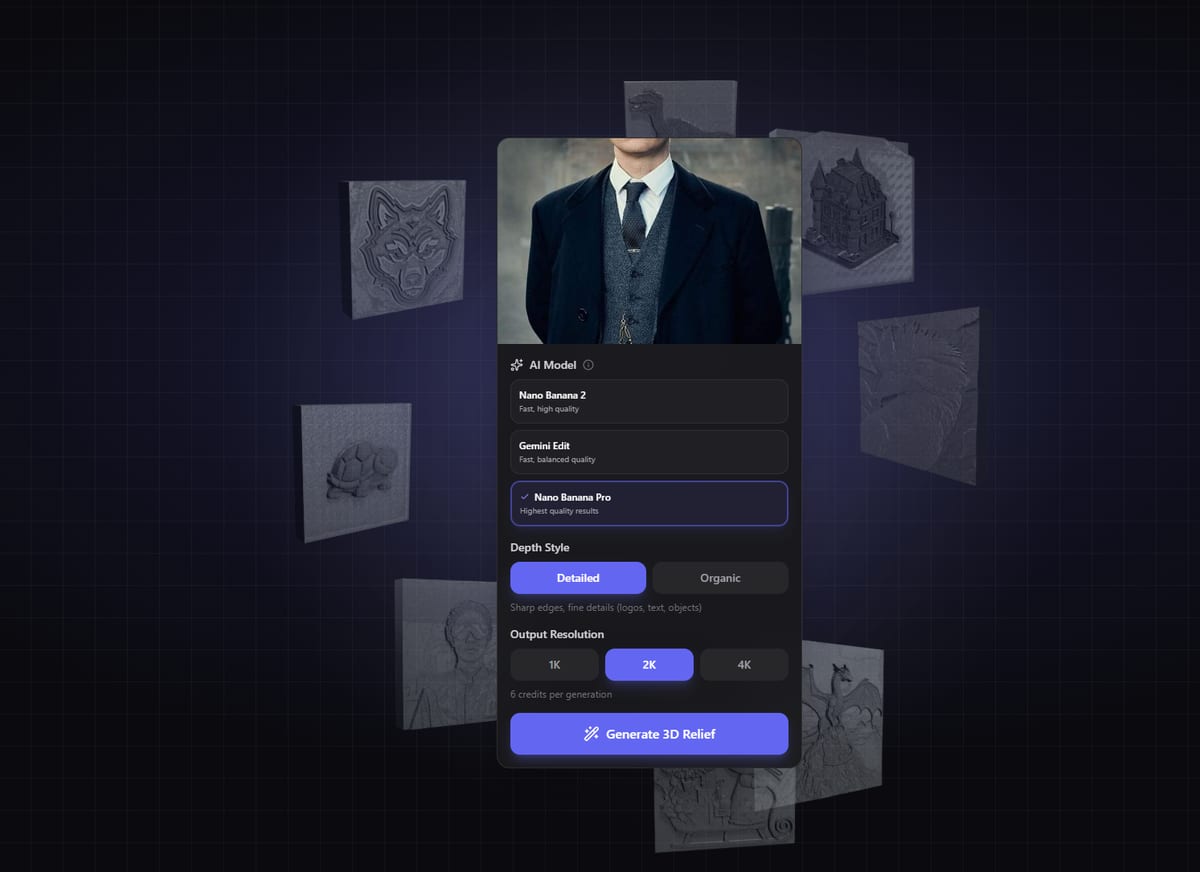
The upload panel with AI model picker, depth style options, and resolution settings.
3D Settings Explained
After generation, you get a live 3D preview with real-time controls. Settings are grouped by function:
Mesh Mode
- Solid - Creates a watertight mesh with a back plate. Use this for 3D printing where your slicer needs a closed volume.
- Planar - Surface only, no back. Use for CNC carving paths or laser engraving files where you just need the relief surface.
Depth Controls
- Depth Intensity (0-0.3) - How tall the relief is. Start around 0.1 for subtle reliefs, go higher for dramatic depth.
- Depth Cutoff (0-95%, planar mode only) - Removes background geometry below a threshold. Useful for isolating a subject from its background.
- Base Thickness (0.01-0.5, solid mode only) - How thick the back plate is. Thicker = stronger print but more material.
- Invert for Mold - Flips the depth so raised areas become recessed. Use this when making casting molds or stamp negatives.
Smoothing and Cleanup
- Smoothing (0-20px) - Blurs the depth map before mesh generation. Removes noise but also softens detail.
- Noise Reduction (0-50) - Targets random speckling without blurring edges as much. Recommended 15-30 for portraits.
- Surface Smoothing (1-10 passes) - Laplacian smoothing applied to the final mesh. Higher passes = smoother polygons.
- Enhance Details (paid only) - Amplifies fine surface detail. Good for architectural elements and text.
Quality and Display
- Mesh Quality (128-1024) - Polygon resolution of the output. Higher values capture more detail but produce larger files.
- Show Texture - Toggles the original image mapped onto the mesh surface.
- Material Presets - 12 options including Matte White PLA, Metallic Bronze, Glossy Resin, Ceramic, and more. These are for preview only and don’t affect the exported file.
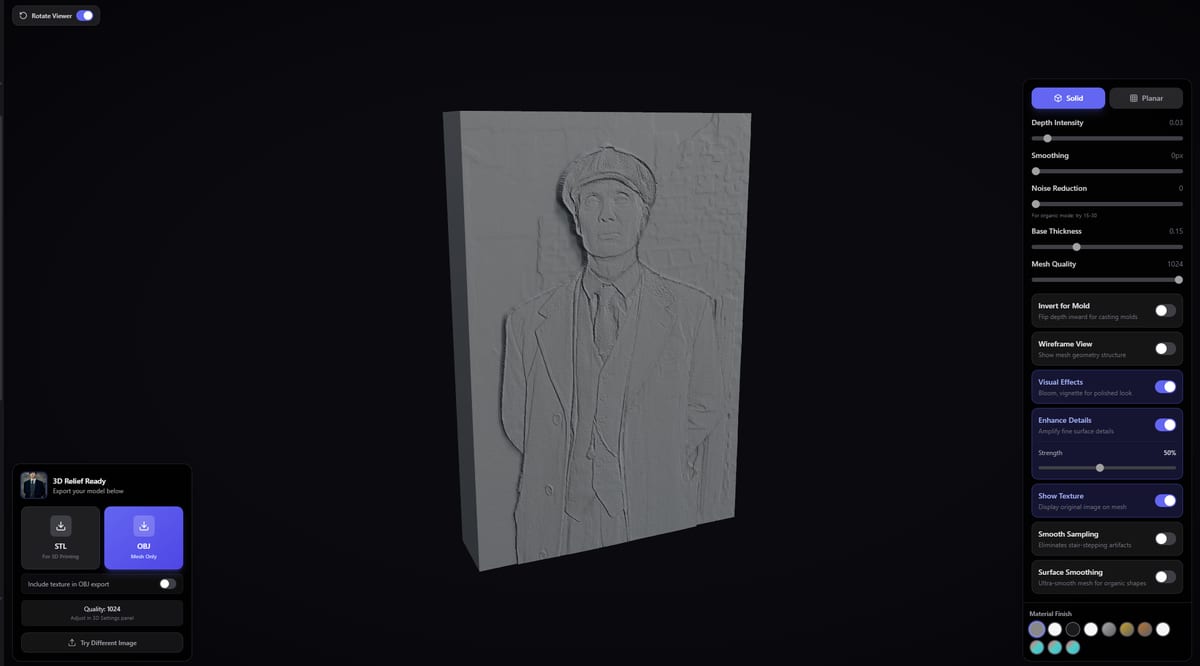
A generated relief sculpture displayed in the 3D viewer with adjustable depth and material controls.
Solid vs Planar Mode
Use Solid when:
- 3D printing (FDM or resin) - slicers need watertight geometry
- Creating standalone decorative pieces
- Making lithophanes (thin relief panels that show images when backlit)
Use Planar when:
- CNC milling - you only need the carving surface, not the stock material
- Laser engraving - flat relief paths without unnecessary underside geometry
- Combining the relief with other 3D models in external software
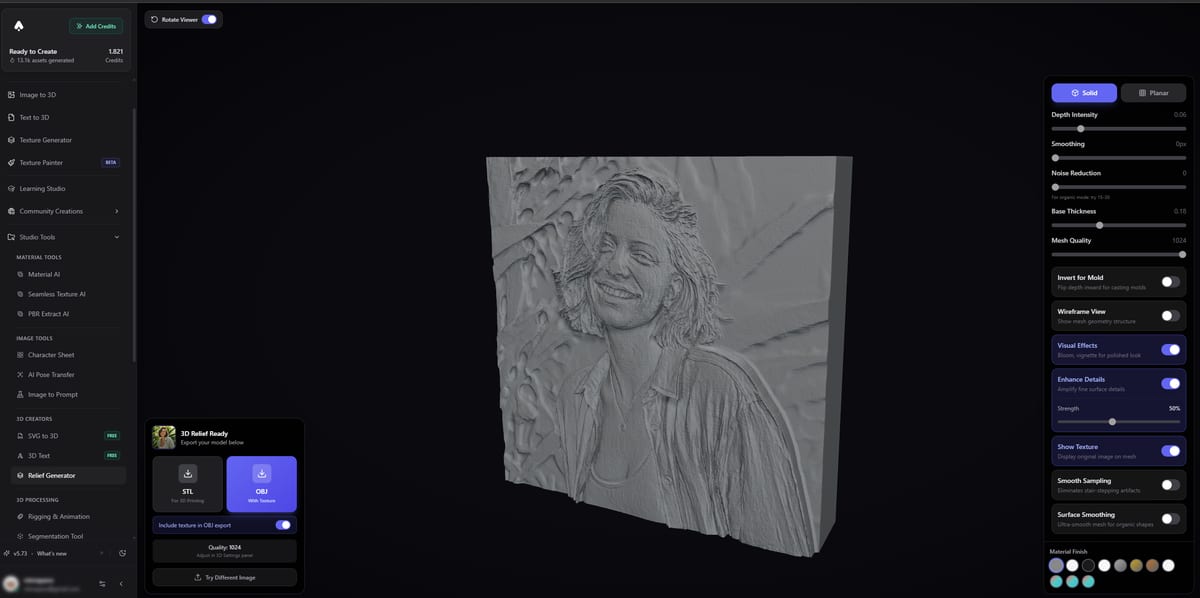
Another relief example highlighting the depth detail and surface texture of the generated output.
Export Options
Download your relief in two formats:
- STL - Geometry only. The standard for 3D printing and CNC. Works with every slicer and CAM program.
- OBJ - Includes geometry plus optional texture as a ZIP. Use when you want the original image mapped onto the relief surface.
Export requires a paid plan. Free users can generate and preview reliefs with full 3D controls, but downloading is locked until you upgrade.
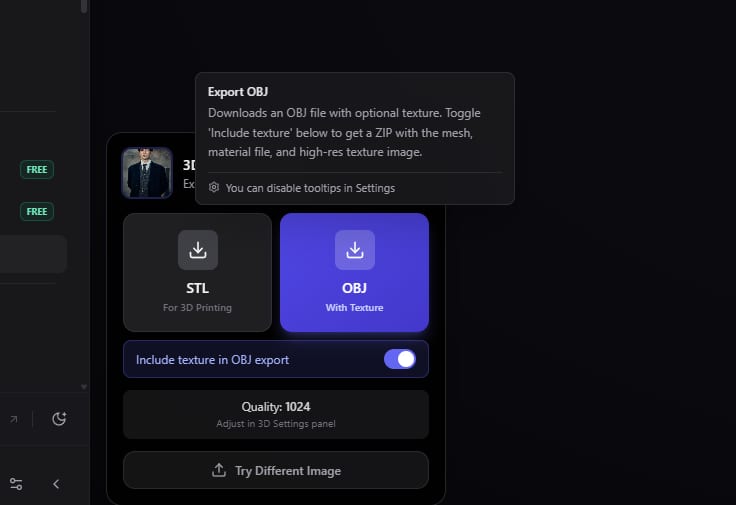
The export panel with STL and OBJ download options for 3D printing and CNC use.
Tips for Best Results
- High-contrast images work best - Clear separation between subject and background produces cleaner depth maps.
- Portraits - Use Organic depth style, noise reduction at 20-30, and smoothing at 5-10px. This prevents skin from looking bumpy.
- Logos and text - Use Detailed depth style with minimal smoothing. Bump up Enhance Details if available.
- Large prints - Use Nano Banana Pro at 4K and mesh quality 512+. The extra resolution prevents visible stair-stepping on big pieces.
- Lithophanes - Solid mode, thin base (0.05-0.1), low depth intensity (0.05-0.08). Print in white PLA or resin for best light transmission.
- Avoid busy backgrounds - Crop your image tight around the subject, or the relief will include unwanted background geometry.
Common Use Cases
- 3D printed wall art - Turn family photos into framed relief panels
- Lithophanes - Thin relief prints that reveal an image when you hold them up to light
- CNC carvings - Mill decorative panels, signs, or architectural details from wood or aluminum
- Custom gifts - Pet portraits, wedding photos, or logos as physical keepsakes
- Mold making - Use Invert for Mold to create negatives for casting in resin or chocolate
- Laser engraving - Planar mode exports work directly as depth paths for laser engravers
What’s Next
Ready to make your first relief? Head to the 3D Relief Generator and upload a photo. For full 3D models from images (not just reliefs), check out Image to 3D.
Last updated: May 2026
Frequently Asked Questions
How much does it cost to generate a 3D relief?
Depth map generation in 3D AI Studio starts at just 4 credits using Nano Banana 2 or Gemini Edit. Nano Banana Pro costs 6 credits at standard resolution and 12 credits at 4K. Once you have the depth map, all 3D mesh adjustments (height, smoothing, resolution, materials) are free since they run in your browser.
Can I make a lithophane with this tool?
Yes, the Relief Generator in 3D AI Studio works great for lithophanes. Use Solid mode with a thin base (0.05-0.1), low depth intensity (0.05-0.08), and export as STL. Print in white PLA or translucent resin for the best effect. When you hold the thin print up to a light source, the image appears through varying thickness.
What image types work best for 3D relief generation?
High-contrast photos with clear separation between subject and background produce the cleanest reliefs. Portraits, logos, architectural shots, and product photos all work well in 3D AI Studio’s Relief Generator. Avoid very dark images, low-contrast scenes, or photos where the subject blends into the background.
Should I use Solid or Planar mode for CNC carving?
Use Planar mode for CNC milling. It generates only the relief surface without a back plate, which matches how CNC carving works - you’re cutting into existing stock material. 3D AI Studio exports the planar mesh as STL, which you can import directly into your CAM software (Fusion 360, VCarve, etc.) as a carving toolpath surface.
Can I create a mold from a relief for resin casting?
Yes. Enable “Invert for Mold” in 3D AI Studio’s Relief Generator before exporting. This flips the depth so raised areas become recessed cavities, giving you a negative you can print and use as a casting mold. Works well for resin, chocolate, soap, and other pourable materials.
What resolution should I use for large 3D prints?
For large prints (over 15cm), use Nano Banana Pro at 4K resolution with mesh quality set to 512 or higher in 3D AI Studio. This prevents visible stair-stepping on the relief surface. The extra resolution costs 12 credits instead of 4, but it’s worth it for pieces where you’ll see fine surface detail up close.
Prompt Tips
Updated May 2026
This page covers how to write prompts that actually work for three things: generating 3D models from text, generating images, and editing existing images. No theory, just practical tips and real examples.
Text to 3D Prompts
When you write a prompt for Text to 3D, the AI needs to understand what object to build, what it looks like, and what style you want. Keep it between 5 and 20 words for most cases. Be specific but don’t overload it.
The formula
Object + key features + material/style + constraints
Prompts that work
| Prompt | What you get | Good for |
|---|---|---|
| ”medieval castle with stone walls and a tall tower” | Detailed architectural model | Environment assets |
| ”cute chibi anime cat girl, big eyes, full body, pastel colors” | Stylized character | Game characters, figurines |
| ”futuristic sci-fi pistol, metallic, detailed, hard surface” | Clean weapon model | Game props |
| ”red sports car, glossy paint, side view, realistic” | Vehicle with good proportions | Product visualization |
| ”wooden stool, three legs, worn oak, subtle wood grain, one solid piece” | Clean furniture model | Interior design |
| ”fantasy potion bottle, chunky glass, wide base, glowing liquid inside” | Stylized prop | RPG game assets |
| ”sci-fi helmet, smooth curved shell, dark matte polymer, symmetrical” | Hard surface model | Character equipment |
| ”cute chubby robot mascot, round body, simple shapes, friendly face” | Cartoon character | Branding, mascots |
What makes prompts better
- Name the material - “wooden”, “metallic”, “glass”, “plastic”, “stone” gives the AI clear texture direction
- Mention the style - “realistic”, “stylized”, “low-poly”, “cartoon”, “photorealistic” sets the aesthetic
- Say “one solid piece” - prevents the AI from generating floating parts or disconnected geometry
- Add “clean geometry” - helps with printing and game engine compatibility
- Specify view - “front view”, “side view”, “three-quarter view” for more predictable results
- Use real names - “wingback chair” works better than “chair with wings on the sides”
What to avoid
- Too vague - “a cool thing” or “something nice” gives the AI nothing to work with
- Too long - paragraphs of text can confuse the model. 5-20 words is the sweet spot
- Contradictions - “realistic cartoon” or “simple with extreme detail” sends mixed signals
- Multiple objects - “a sword and a shield and a helmet” usually produces a messy result. Generate one object at a time
- Scene descriptions - “a knight standing in a forest next to a dragon” is a scene, not a single 3D model. Focus on one object
Model-specific tips
| Model | Works best with | Tip |
|---|---|---|
| Prism 3.1 | Detailed objects, realistic style | Add “PBR texture” for better materials |
| Prism Turbo | Quick concepts, simple objects | Keep prompts shorter (5-10 words) |
| Hunyuan 3.1 Pro | Organic shapes, characters | Try the “Geometry” mode for untextured sculpts |
| Meshy 6 | Characters, creatures | Use “full body” and specify a pose |
| Forge Gen-2 | Detailed props, hard surface | Mention specific materials and surface finish |
| Tripo P1 | Game-ready assets | Add “game ready” or “game asset” to the prompt |
Image Generation Prompts
When generating images in Image Studio, different AI models need different prompting styles. But all of them respond well to clear, descriptive language.
The formula
Subject + action/pose + style + context/lighting
Prompts that work
| Prompt | Model | What you get |
|---|---|---|
| ”stylized 3D cartoon owl, soft lighting, clean white background” | ImageGen 4 | Clean reference for Image to 3D |
| ”professional product photo of a leather watch, studio lighting, white background” | Flux 2 | Product photography |
| ”anime warrior girl with blue hair and katana, full body, cel shaded” | ImageGen 4 | Character concept art |
| ”LEGO minifigure of an orc warrior, plastic material, studio lighting” | ImageGen 4 | Stylized figurine for 3D conversion |
| ”architectural interior, modern kitchen, natural window light, wide angle” | Flux 2 | Photorealistic interior |
| ”pixel art game character, knight with sword, 16-bit style, transparent background” | Flux 2 | Game sprite |
Model-specific advice
Flux 2 - Write prompts like natural sentences, not keyword lists. Flux understands flowing descriptions better than comma-separated tags. Put the most important element first. No negative prompts needed. For photorealism, mention camera models (“shot on Fujifilm X-T5”) and lighting setups.
ImageGen 4 - Great at following complex instructions with minimal prompting. Produces photorealistic results with simple descriptions. Good at text rendering in images.
GPT-Image-1 - Excellent at following detailed instructions. Works well with structured prompts (scene, subject, details, constraints). Best for text-in-image and complex compositions.
For Image to 3D conversion
If you’re generating an image to convert to a 3D model afterward, add these to your prompt:
- “clean white background” or “studio lighting” - makes the AI focus on the object
- “full body” or “complete object visible” - prevents cropping
- “single object, centered” - avoids confusion about what to convert
- “3D render style” or “stylized 3D” - produces images that convert to 3D better than flat illustrations
Image Editing Prompts
When editing images in Image Studio (using GPT-Image-2 Edit, Gemini Edit, or Nano Banana), the key principle is: say what to change AND what to keep.
The formula
What to change + what to preserve + style/quality constraints
Prompts that work
| Prompt | What it does |
|---|---|
| ”turn this person into a LEGO minifigure, plastic material, clean background. Keep the pose and general appearance.” | Style transfer while preserving identity |
| ”remove the background. Keep the subject exactly as is.” | Clean background removal |
| ”change the lighting to warm sunset. Keep everything else the same.” | Relighting |
| ”turn into a stylized 3D figurine, full body, clean background” | Convert photo to 3D-ready reference |
| ”make it Ghibli style. Preserve the composition and subject position.” | Art style transfer |
| ”replace the jacket with a navy windbreaker. Do not change face, pose, lighting, or background.” | Surgical clothing swap |
Key principles
- Be specific about what stays the same - “keep the face, pose, lighting, and background unchanged” prevents drift
- One change at a time - don’t try to change background, clothing, and style in one prompt. Do it in rounds.
- Describe the target, not the process - “warm sunset lighting” works better than “make the image warmer”
- For text in images - put the exact text in quotes: ‘write “SALE 50% OFF” in bold white letters, top center’
- Match lighting - if the original has warm light, don’t ask for cold light in the edit or the result will look composited
Model comparison for editing
| Model | Best for | Notes |
|---|---|---|
| GPT-Image-2 Edit | Precise edits, text rendering, photorealism | Most capable overall, best at following complex instructions |
| Gemini Edit | Quick style changes, creative edits | Fast, good for experimentation |
| Nano Banana 2 | General editing, background changes | Good balance of speed and quality |
The Best Workflow
The highest quality results usually come from combining image generation with 3D generation:
- Generate a reference image in Image Studio with a clean prompt
- Edit it if needed (remove background, adjust style, fix details)
- Convert to 3D using Image to 3D with Prism 3.1
This gives you more control than Text to 3D alone, because you can see and refine the 2D reference before committing to 3D generation.
Try Text to 3D - Open Image Studio - Try Image to 3D
Frequently Asked Questions
What’s the ideal prompt length for AI 3D generation?
For Text to 3D in 3D AI Studio, 5-20 words works best. Anything shorter than 5 words is usually too vague, and anything over 20 words tends to confuse the model. Focus on naming the object, its key material, and the style you want. A prompt like “medieval stone castle with tall tower” is more effective than a 50-word paragraph.
Do different AI models need different prompting styles?
Yes. In 3D AI Studio, Prism Turbo works best with short, punchy prompts (5-10 words), while Hunyuan 3.1 Pro handles more detailed descriptions. For image generation, Flux 2 prefers natural sentences over comma-separated keywords, and ImageGen 4 follows complex instructions well with minimal prompting. Check the model-specific tips table on this page for guidance.
How do I write prompts for game-ready 3D assets?
Add keywords like “game ready,” “game asset,” or “clean topology” to your prompt in 3D AI Studio. Specify the art style (“low-poly,” “stylized,” “realistic PBR”) and mention “one solid piece” to prevent floating geometry. For the Tripo P1 model specifically, just adding “game ready” to any object prompt optimizes the output for game engines.
Why does my AI 3D model have floating parts or broken geometry?
This usually happens when the prompt describes multiple objects or a complex scene. In 3D AI Studio, always describe a single object and add “one solid piece” or “single connected mesh” to your prompt. Avoid prompts like “a sword and shield” - generate each item separately instead.
What prompt keywords improve texture quality?
Adding “PBR texture,” “detailed surface,” or specific material names (“brushed steel,” “worn leather,” “polished marble”) in 3D AI Studio gives the AI clearer direction for textures. Also mention “realistic” or “photorealistic” if you want lifelike surface detail. Enable the PBR toggle in settings to get normal, roughness, and metallic maps alongside the base color.
How do I prompt for images that convert well to 3D?
Include “clean white background,” “single object, centered,” and “3D render style” in your image generation prompt. These keywords tell 3D AI Studio’s Image Studio to produce isolated objects with good depth cues that the Image to 3D converter handles easily. Avoid flat illustration styles, and use “full body” for characters to prevent cropping.